")

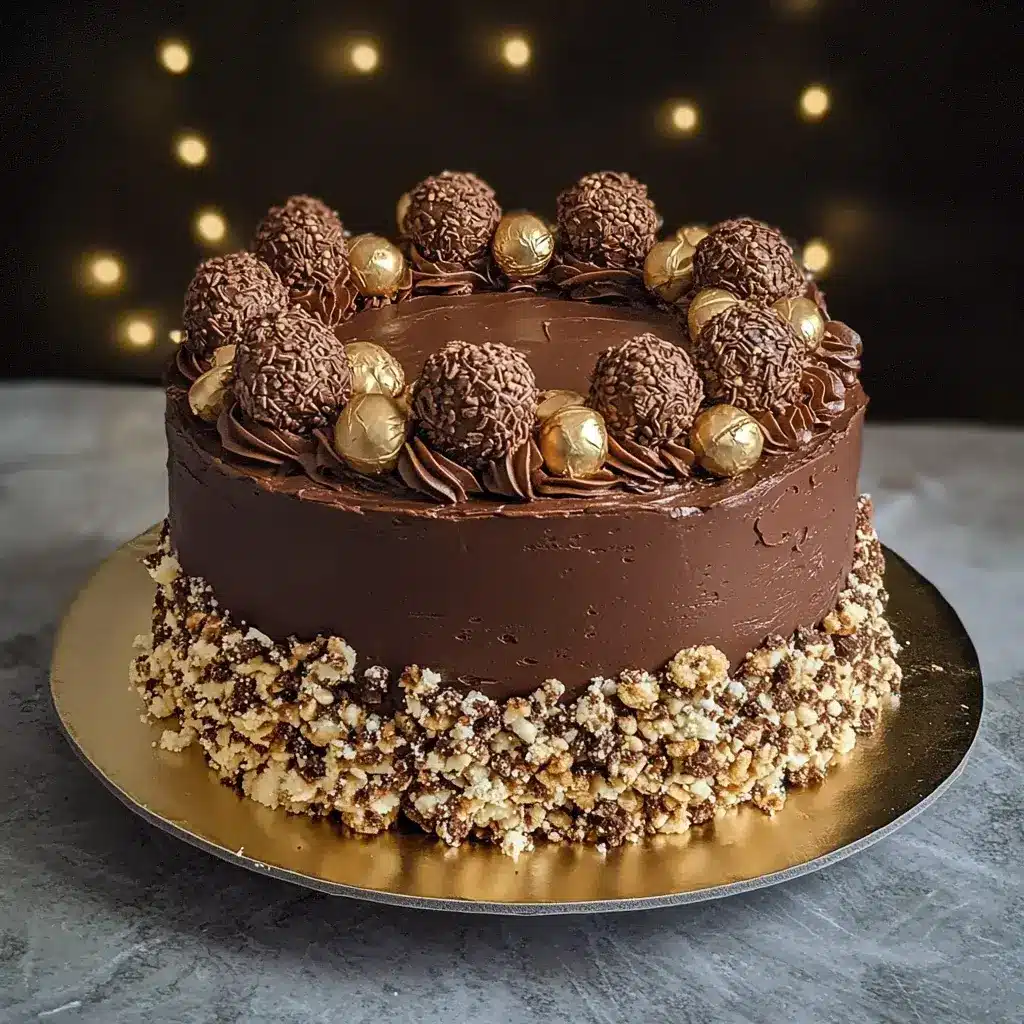
There are moments in life that call for pure, unadulterated indulgence. For those moments, when only the most decadent, show-stopping dessert will do, I turn to this Ferrero Rocher Cake. It’s more than just a cake; it’s an experience, a tribute to that iconic gold-wrapped hazelnut confection we all know and love. I first attempted this recipe for my husband’s milestone birthday – he’s a die-hard Ferrero Rocher fan, and I wanted something truly special. The process felt like building treasure: layers of moist, deeply chocolatey cake infused with hazelnut, a ridiculously silky Nutella buttercream that tastes like pure bliss, and that crucial layer of crispy wafer bits and toasted hazelnuts mimicking the candy’s signature crunch. The aroma filling the kitchen – rich chocolate, toasted nuts, sweet hazelnut spread – was intoxicating. When we finally presented the finished cake, adorned with glistening Ferrero Rocher chocolates, the reaction was exactly what I’d hoped for: stunned silence, followed by audible gasps. Cutting into it revealed the beautiful layers, and the first bite… oh, that first bite! It was everything I dreamed of – the tender cake, the smooth, nutty frosting, the delightful crunch. It perfectly captured the essence of a Ferrero Rocher in cake form. It was, without exaggeration, the star of the celebration, and requests for the recipe (and repeat performances!) have been constant ever since. This cake isn’t just baked; it’s crafted, and sharing it feels like sharing a piece of pure, luxurious joy.
Decoding the Decadence: Ferrero Rocher Cake Ingredients
Creating this masterpiece involves several components, each contributing to the final symphony of textures and flavours. Precision is key for baking success. Using kitchen scales for dry ingredients is recommended for utmost accuracy.
For the Moist Hazelnut Chocolate Cake Layers:
- All-Purpose Flour: 2 cups (approx. 250g) – The primary structural component.
- Granulated Sugar: 1 ¾ cups (approx. 350g) – Provides sweetness and moisture.
- Unsweetened Cocoa Powder: ¾ cup (approx. 75g) – Use high-quality natural cocoa powder for intense chocolate flavour.
- Hazelnut Flour/Meal (Ground Hazelnuts): ½ cup (approx. 50g) – Adds distinct hazelnut flavour and texture directly into the cake crumb. Ensure it’s finely ground. You can often buy this or make it by pulsing toasted hazelnuts in a food processor until fine (be careful not to over-process into butter).
- Baking Soda: 1 ½ teaspoons – Primary leavening agent.
- Baking Powder: 1 teaspoon – Provides additional lift.
- Salt: 1 teaspoon – Balances sweetness and enhances flavours.
- Large Eggs: 2, room temperature – Bind ingredients and add richness.
- Buttermilk: 1 cup (240ml), room temperature – Adds moisture, tang, and tenderness (reacts with baking soda). (DIY substitute: 1 cup milk + 1 tbsp white vinegar or lemon juice, let sit 5-10 mins).
- Vegetable Oil: ½ cup (120ml) – Ensures a moist cake (use a neutral oil like canola or sunflower).
- Vanilla Extract: 2 teaspoons – Enhances chocolate and hazelnut notes.
- Hot Water or Hot Brewed Coffee: 1 cup (240ml) – Blooms the cocoa for deeper flavour and adds moisture. Coffee intensifies the chocolate flavour beautifully.
For the Silky Nutella Buttercream Frosting:
- Unsalted Butter: 1 ½ cups (3 sticks or 340g), softened to room temperature – The base of the frosting. Must be properly softened.
- Nutella (or other Chocolate Hazelnut Spread): 1 generous cup (approx. 300g) – The star flavour! Use good quality spread.
- Powdered Sugar (Icing Sugar): 3-4 cups (approx. 360-480g), sifted – For sweetness and structure. Start with less and add more if needed for consistency. Sifting is essential for smoothness.
- Unsweetened Cocoa Powder: ¼ cup (approx. 25g), sifted (optional, for deeper chocolate flavour) – Enhances the chocolate aspect.
- Heavy Cream or Milk: 2-4 tablespoons (30-60ml), room temperature – To achieve the desired spreading consistency.
- Vanilla Extract: 1 teaspoon – Complements the hazelnut and chocolate.
- Salt: ¼ teaspoon – Balances the sweetness.
For the Signature Crunchy Hazelnut Wafer Layer:
- Plain Ice Cream Sugar Cones or Simple Wafer Cookies (like Nilla Wafers or Piroulines without filling): 1 ½ cups crushed (approx. 100-120g) – Provides the essential crispy wafer texture. Crush them finely but not into powder – small pieces are good. Sugar cones offer a great neutral crunch.
- Hazelnuts: ½ cup (approx. 70g), toasted and finely chopped – Adds nutty flavour and crunch. Toasting is crucial.
- Nutella: ¼ cup (approx. 60g), slightly warmed or room temperature – Acts as a binder for the crunchy elements.
For Garnish & Assembly:
- Ferrero Rocher Chocolates: Approximately 12-16 candies – For decorating the top and potentially around the base.
- Chopped Toasted Hazelnuts: ½ cup (approx. 70g) – For pressing around the base or sprinkling on top.
- Chocolate Ganache Drip (Optional):
- Semi-Sweet Chocolate Chips or Chopped Chocolate: ½ cup (approx. 90g)
- Heavy Cream: ¼ cup (60ml)
Building the Dream: Step-by-Step Instructions
Let’s break down the process into manageable stages: baking the cake, preparing the fillings and frosting, and finally, assembling this showstopper.
Part 1: Baking the Hazelnut Chocolate Cake Layers
- Preheat & Prep: Preheat your oven to 350°F (175°C). Grease and flour three 8-inch round cake pans. For extra security, line the bottoms with parchment paper rounds and grease/flour the sides. Proper prep prevents sticking.
- Toast Hazelnuts (for Flour & Garnish): If making your own hazelnut flour or using whole hazelnuts for garnish/crunch layer, toast them first. Spread hazelnuts on a baking sheet and toast in the preheated oven for 7-10 minutes, until fragrant and lightly browned. Let cool completely. If making flour, process the cooled nuts in a food processor until finely ground. For garnish/crunch, roughly chop them.
- Whisk Dry Ingredients: In a large mixing bowl, whisk together the all-purpose flour, granulated sugar, unsweetened cocoa powder, hazelnut flour/meal, baking soda, baking powder, and salt. Ensure there are no lumps, especially from the cocoa or hazelnut flour.
- Combine Wet Ingredients: In a separate medium bowl, whisk together the room temperature eggs, buttermilk, vegetable oil, and vanilla extract until well combined.
- Combine Wet and Dry: Pour the wet ingredients into the large bowl with the dry ingredients. Using a stand mixer with a paddle attachment on low speed, or a handheld electric mixer on low, mix just until combined. Scrape down the sides and bottom of the bowl. Do not overmix.
- Add Hot Liquid: Carefully pour the hot water or hot brewed coffee into the batter. The batter will be thin. Mix on low speed again only until incorporated, about 30 seconds. Scrape the bowl one last time.
- Divide and Bake: Divide the batter evenly among the three prepared cake pans. Using a kitchen scale ensures perfectly even layers. Tap the pans gently on the counter to release large air bubbles.
- Baking Time: Bake for 28-33 minutes, or until a wooden skewer inserted into the center comes out clean or with a few moist crumbs attached. The tops should spring back lightly when touched. Start checking at the lower end of the time range.
- Cooling Protocol: Remove cake pans from the oven and place them on a wire cooling rack. Let the cakes cool in the pans for 15-20 minutes. This helps them stabilize.
- Invert & Cool Completely: Carefully run a thin knife or offset spatula around the cake edges. Invert the cakes onto the wire rack, peel off parchment paper, and let them cool completely to room temperature (at least 1-2 hours) before proceeding. Trying to frost warm cakes leads to disaster!
Part 2: Crafting the Frosting and Crunchy Layer
- Make the Nutella Buttercream: In the bowl of a stand mixer with the paddle attachment, or using a large bowl and handheld mixer, beat the softened unsalted butter on medium-high speed for 3-5 minutes until very pale and fluffy. Add the Nutella and beat until fully combined and smooth.
- Add Sugar & Cocoa: Sift the powdered sugar (start with 3 cups) and optional cocoa powder together. With the mixer on low, gradually add the sugar mixture to the butter/Nutella mixture, alternating with small amounts of the heavy cream or milk. Mix until incorporated.
- Whip to Perfection: Add the vanilla extract and salt. Increase the mixer speed to medium-high and beat for another 2-3 minutes until the frosting is light, airy, and exceptionally smooth. Scrape down the bowl frequently. If the frosting is too stiff, add more cream/milk one teaspoon at a time. If too soft, add more sifted powdered sugar ¼ cup at a time, or chill briefly.
- Prepare the Crunchy Wafer Layer: In a medium bowl, combine the crushed wafer cookies/cones and the finely chopped toasted hazelnuts. Add the ¼ cup of Nutella and stir gently until the dry ingredients are just coated and slightly clumped together. You don’t want a paste, just enough Nutella to help it hold together slightly. Set aside.
Part 3: Assembling the Ferrero Rocher Cake
- Level the Cakes (Optional but Recommended): Once completely cool, use a long serrated knife or cake leveler to trim the domed tops off the cake layers for a flat, stable surface. Save the scraps!
- Prepare Serving Plate: Place a small dab of Nutella buttercream in the center of your cake stand or serving plate to anchor the cake. Consider placing strips of parchment paper under the edges of the first layer to catch drips while frosting (pull out gently after frosting).
- First Layer: Place one cake layer, cut-side up, on the plate. Spread a generous, even layer of Nutella buttercream over the top (about ½ – ¾ inch thick).
- Add the Crunch: Carefully sprinkle about half of the prepared crunchy wafer-hazelnut mixture evenly over the buttercream layer, pressing it down very gently just to adhere.
- Second Layer: Place the second cake layer on top, cut-side down. Gently press to level. Spread another generous layer of Nutella buttercream. Sprinkle the remaining half of the crunchy wafer-hazelnut mixture over the frosting, gently pressing to adhere.
- Third Layer: Place the final cake layer on top, cut-side down. Gently press to ensure the cake is level.
- Crumb Coat: Apply a thin, even layer of the Nutella buttercream over the entire cake (top and sides). This traps crumbs and doesn’t need to be perfect. Use an offset spatula for smoothing. Refrigerate the crumb-coated cake for at least 30 minutes (or freeze for 15 mins) until the frosting is firm. This step ensures a clean final coat.
- Final Frosting: Apply the remaining Nutella buttercream generously over the chilled crumb coat. Use an offset spatula for the top and an offset spatula or bench scraper for smooth sides. You can create swirls on top or textured patterns on the sides.
- Optional Chocolate Drip (Ganache): If desired, prepare the ganache. Place chocolate chips/chopped chocolate in a heatproof bowl. Heat the heavy cream in a small saucepan or microwave until just simmering (not boiling). Pour the hot cream over the chocolate. Let it sit for 3-5 minutes without stirring. Then, gently whisk until smooth and glossy. Let the ganache cool slightly until it’s thickened but still pourable (cool enough not to melt the buttercream on contact – test on a small hidden spot if unsure). Carefully spoon or pour the ganache around the top edge of the chilled cake, letting it drip down the sides. You can then spread a thin layer over the remaining exposed top if desired. Let the drip set slightly (you can chill the cake briefly again).
- Garnish: This is where the magic happens!
- Press chopped toasted hazelnuts around the base of the cake.
- Arrange whole Ferrero Rocher chocolates on top. You can place them around the edge, perhaps on dollops of remaining frosting, or create a pattern in the center. Some people like to halve them carefully with a sharp knife to show the inside.
- Sprinkle extra chopped hazelnuts or even some leftover wafer crumbs over the top.
- Chill Before Serving (Recommended): Chill the fully decorated cake in the refrigerator for at least 30-60 minutes before slicing. This helps the frosting and ganache set firmly for cleaner cuts.
Nutritional Considerations (Estimates)
This Ferrero Rocher Cake is undeniably a decadent treat. The nutritional information provided is an estimate and can vary based on specific ingredient brands, exact slice sizes, and modifications.
- Servings: This recipe typically yields 12-16 generous servings.
- Calories per Serving (Estimate): Approximately 700-950 calories per serving (based on 1/14th of the cake). This reflects the richness of the butter, Nutella, chocolate, nuts, oil, and sugar. Enjoy responsibly as a special occasion dessert!
For precise calculations, use an online recipe nutrition calculator with your specific ingredient details.
Timing Your Masterpiece: Prep & Bake Time
Creating this cake takes time, but much of it is passive cooling or chilling. Plan accordingly:
- Active Preparation Time: Approximately 1 – 1.5 hours (includes mixing batter, making frosting, preparing crunch layer, assembly).
- Baking Time: 28-33 minutes.
- Cake Cooling Time: Minimum 2 hours (essential).
- Chilling Times (Crumb Coat, Final Chill): Approximately 1 – 1.5 hours total.
- Ganache Prep & Cooling (If Using): Add 15-20 minutes.
Total Estimated Time (Start to Finish, including cooling/chilling): Approximately 4.5 – 6 hours. This can easily be broken down over two days (bake layers one day, frost and assemble the next).
Serving Suggestions: Presenting Your Ferrero Rocher Cake
This cake demands a presentation worthy of its flavour. Here’s how to serve it in style:
- The Grand Reveal: Present the whole cake on a beautiful cake stand before slicing.
- Perfect Slices: Use a tall, sharp knife. Dip the knife in hot water and wipe it clean between each cut for pristine slices that showcase the layers and crunchy texture.
- Plating Elegance:
- Serve slices on individual dessert plates.
- A drizzle of leftover slightly warmed Nutella or chocolate sauce on the plate adds flair.
- A dusting of cocoa powder on the plate looks sophisticated.
- A few extra toasted chopped hazelnuts sprinkled around the slice.
- Accompaniments:
- Coffee/Espresso: The bitterness cuts through the richness beautifully.
- Milk: A simple, comforting classic.
- Dessert Wine/Liqueur: A glass of Tawny Port, or a small measure of hazelnut liqueur (like Frangelico) or coffee liqueur enhances the luxurious feel for adults.
- Ice Cream: While rich on its own, a small scoop of high-quality vanilla bean or coffee ice cream can work, but might be overkill for some.
- Ideal Occasions:
- Birthdays (especially for Nutella/Ferrero lovers!)
- Anniversaries & Valentine’s Day
- New Year’s Eve Celebrations
- Dinner Parties where you want to impress
- Any special gathering demanding a truly spectacular dessert.
Baker’s Gold: 5 Essential Tips for Ferrero Rocher Cake Success
Elevate your cake from delicious to unforgettable with these key tips:
- Don’t Skip Toasting the Hazelnuts: This is non-negotiable for achieving that deep, authentic Ferrero Rocher flavour. Toasting awakens the oils and intensifies the nuttiness in the hazelnut flour, the crunchy layer, and the garnish. Let them cool completely before grinding or chopping.
- Master the Crunchy Layer: The combination of crushed wafers and toasted hazelnuts is crucial for mimicking the candy. Don’t crush the wafers into dust – leave some small pieces for texture. Mix gently with just enough Nutella to bind; too much will make it soggy rather than crunchy. Apply it between the frosting layers so it adheres well.
- Quality Ingredients Shine: This cake relies heavily on its core flavours. Use a good quality unsweetened cocoa powder for a rich chocolate base. Use real unsalted butter (not margarine) for the frosting. And while any chocolate hazelnut spread works, using actual Nutella provides that specific, recognizable taste many associate with Ferrero Rocher.
- Embrace the Crumb Coat & Chill: Don’t underestimate the power of a crumb coat followed by chilling. This step is vital for achieving a smooth, professional-looking final layer of frosting, free from pesky cake crumbs, especially with a rich, dark cake like this one. Chilling the fully frosted cake also makes slicing much neater.
- Plan Ahead – Don’t Rush: This isn’t a quick bake. Allow ample time for each stage, especially the complete cooling of the cake layers and the chilling times during assembly. You can easily make the cake layers a day ahead, wrap them well once cool, and store at room temperature. The frosting can also be made a day ahead and stored in the fridge (bring to room temp and re-whip briefly before use). Assemble on the day of serving or the day before.
Ferrero Rocher Cake Conundrums: FAQ Answered
Here are answers to common questions you might have about this recipe:
- Q: Can I make this cake without hazelnut flour?
- A: Yes, you can substitute the ½ cup of hazelnut flour in the cake batter with an additional ½ cup of all-purpose flour. The cake will still be delicious, but it won’t have that underlying hazelnut flavour woven into the crumb itself. The Nutella frosting and hazelnut crunch layer will still provide plenty of hazelnut taste. Ensure you still include toasted chopped hazelnuts in the crunchy layer and garnish.
- Q: My Nutella frosting seems too soft/runny. How can I fix it?
- A: This can happen if your butter was too soft, your kitchen is warm, or your Nutella was warm. First, try chilling the frosting bowl in the refrigerator for 15-20 minutes, then re-whip it. If it’s still too soft, you can gradually beat in more sifted powdered sugar, ¼ cup at a time, until it reaches the desired consistency. Be careful not to make it overly sweet.
- Q: How should I store leftover Ferrero Rocher Cake?
- A: Due to the buttercream frosting (containing butter and cream/milk) and potential ganache, this cake must be stored in the refrigerator. Place it in an airtight cake container or cover it loosely with plastic wrap (try inserting toothpicks to prevent wrap from sticking to the frosting). It will keep well for 3-4 days. For the best taste and texture, let slices sit at room temperature for about 20-30 minutes before serving to allow the frosting to soften slightly. The wafer layer may soften slightly upon refrigeration.
- Q: Can I freeze this cake?
- A: Yes. You can freeze the unfrosted, completely cooled cake layers tightly wrapped in plastic wrap and then foil for up to 2 months. Thaw overnight in the refrigerator before frosting. You can also freeze the fully assembled and frosted cake (before adding Ferrero Rocher candies as garnish, as they don’t freeze/thaw perfectly). Flash freeze the frosted cake uncovered until solid (1-2 hours), then wrap tightly in several layers of plastic wrap and foil. Freeze for up to 1 month. Thaw overnight in the refrigerator without the wrapping initially to prevent condensation making the frosting weepy, then loosely cover once thawed. Add fresh Ferrero Rocher candies before serving. Note that the texture of the crunchy layer might be compromised after freezing.
- Q: Can I simplify this recipe? Maybe make it as a sheet cake?
- A: Absolutely! To simplify:
- Sheet Cake: Bake the cake batter in a greased and floured 9×13 inch pan (adjust baking time, likely 35-45 minutes, check with toothpick). Let cool completely in the pan. Make about ⅔ of the frosting recipe. Spread the frosting over the top. Sprinkle the entire crunchy wafer-hazelnut mixture over the frosting. Garnish with chopped hazelnuts and halved Ferrero Rocher candies. Much easier, still delicious!
- Fewer Layers: Bake in two 8-inch or 9-inch pans instead of three (layers will be thicker, adjust bake time upwards). You’ll only have one crunchy filling layer.
- Simpler Garnish: Skip the chocolate drip and just decorate with the frosting, chopped nuts, and candies.
- A: Absolutely! To simplify:
Prepare to impress yourself and anyone lucky enough to share a slice of this truly spectacular Ferrero Rocher Cake!
Print
Ferrero Rocher Cake recipe
Ingredients
-
- All-Purpose Flour: 2 cups (approx. 250g) – The primary structural component.
-
- Granulated Sugar: 1 ¾ cups (approx. 350g) – Provides sweetness and moisture.
-
- Unsweetened Cocoa Powder: ¾ cup (approx. 75g) – Use high-quality natural cocoa powder for intense chocolate flavour.
-
- Hazelnut Flour/Meal (Ground Hazelnuts): ½ cup (approx. 50g) – Adds distinct hazelnut flavour and texture directly into the cake crumb. Ensure it’s finely ground. You can often buy this or make it by pulsing toasted hazelnuts in a food processor until fine (be careful not to over-process into butter).
-
- Baking Soda: 1 ½ teaspoons – Primary leavening agent.
-
- Baking Powder: 1 teaspoon – Provides additional lift.
-
- Salt: 1 teaspoon – Balances sweetness and enhances flavours.
-
- Large Eggs: 2, room temperature – Bind ingredients and add richness.
-
- Buttermilk: 1 cup (240ml), room temperature – Adds moisture, tang, and tenderness (reacts with baking soda). (DIY substitute: 1 cup milk + 1 tbsp white vinegar or lemon juice, let sit 5-10 mins).
-
- Vegetable Oil: ½ cup (120ml) – Ensures a moist cake (use a neutral oil like canola or sunflower).
-
- Vanilla Extract: 2 teaspoons – Enhances chocolate and hazelnut notes.
-
- Hot Water or Hot Brewed Coffee: 1 cup (240ml) – Blooms the cocoa for deeper flavour and adds moisture. Coffee intensifies the chocolate flavour beautifully.
For the Silky Nutella Buttercream Frosting:
-
- Unsalted Butter: 1 ½ cups (3 sticks or 340g), softened to room temperature – The base of the frosting. Must be properly softened.
-
- Nutella (or other Chocolate Hazelnut Spread): 1 generous cup (approx. 300g) – The star flavour! Use good quality spread.
-
- Powdered Sugar (Icing Sugar): 3-4 cups (approx. 360-480g), sifted – For sweetness and structure. Start with less and add more if needed for consistency. Sifting is essential for smoothness.
-
- Unsweetened Cocoa Powder: ¼ cup (approx. 25g), sifted (optional, for deeper chocolate flavour) – Enhances the chocolate aspect.
-
- Heavy Cream or Milk: 2-4 tablespoons (30-60ml), room temperature – To achieve the desired spreading consistency.
-
- Vanilla Extract: 1 teaspoon – Complements the hazelnut and chocolate.
-
- Salt: ¼ teaspoon – Balances the sweetness.
For the Signature Crunchy Hazelnut Wafer Layer:
-
- Plain Ice Cream Sugar Cones or Simple Wafer Cookies (like Nilla Wafers or Piroulines without filling): 1 ½ cups crushed (approx. 100-120g) – Provides the essential crispy wafer texture. Crush them finely but not into powder – small pieces are good. Sugar cones offer a great neutral crunch.
-
- Hazelnuts: ½ cup (approx. 70g), toasted and finely chopped – Adds nutty flavour and crunch. Toasting is crucial.
-
- Nutella: ¼ cup (approx. 60g), slightly warmed or room temperature – Acts as a binder for the crunchy elements.
For Garnish & Assembly:
-
- Ferrero Rocher Chocolates: Approximately 12-16 candies – For decorating the top and potentially around the base.
-
- Chopped Toasted Hazelnuts: ½ cup (approx. 70g) – For pressing around the base or sprinkling on top.
-
- Chocolate Ganache Drip (Optional):
-
- Semi-Sweet Chocolate Chips or Chopped Chocolate: ½ cup (approx. 90g)
-
- Heavy Cream: ¼ cup (60ml)
-
- Chocolate Ganache Drip (Optional):
Instructions
-
- Preheat & Prep: Preheat your oven to 350°F (175°C). Grease and flour three 8-inch round cake pans. For extra security, line the bottoms with parchment paper rounds and grease/flour the sides. Proper prep prevents sticking.
-
- Toast Hazelnuts (for Flour & Garnish): If making your own hazelnut flour or using whole hazelnuts for garnish/crunch layer, toast them first. Spread hazelnuts on a baking sheet and toast in the preheated oven for 7-10 minutes, until fragrant and lightly browned. Let cool completely. If making flour, process the cooled nuts in a food processor until finely ground. For garnish/crunch, roughly chop them.
-
- Whisk Dry Ingredients: In a large mixing bowl, whisk together the all-purpose flour, granulated sugar, unsweetened cocoa powder, hazelnut flour/meal, baking soda, baking powder, and salt. Ensure there are no lumps, especially from the cocoa or hazelnut flour.
-
- Combine Wet Ingredients: In a separate medium bowl, whisk together the room temperature eggs, buttermilk, vegetable oil, and vanilla extract until well combined.
-
- Combine Wet and Dry: Pour the wet ingredients into the large bowl with the dry ingredients. Using a stand mixer with a paddle attachment on low speed, or a handheld electric mixer on low, mix just until combined. Scrape down the sides and bottom of the bowl. Do not overmix.
-
- Add Hot Liquid: Carefully pour the hot water or hot brewed coffee into the batter. The batter will be thin. Mix on low speed again only until incorporated, about 30 seconds. Scrape the bowl one last time.
-
- Divide and Bake: Divide the batter evenly among the three prepared cake pans. Using a kitchen scale ensures perfectly even layers. Tap the pans gently on the counter to release large air bubbles.
-
- Baking Time: Bake for 28-33 minutes, or until a wooden skewer inserted into the center comes out clean or with a few moist crumbs attached. The tops should spring back lightly when touched. Start checking at the lower end of the time range.
-
- Cooling Protocol: Remove cake pans from the oven and place them on a wire cooling rack. Let the cakes cool in the pans for 15-20 minutes. This helps them stabilize.
-
- Invert & Cool Completely: Carefully run a thin knife or offset spatula around the cake edges. Invert the cakes onto the wire rack, peel off parchment paper, and let them cool completely to room temperature (at least 1-2 hours) before proceeding. Trying to frost warm cakes leads to disaster!
Part 2: Crafting the Frosting and Crunchy Layer
-
- Make the Nutella Buttercream: In the bowl of a stand mixer with the paddle attachment, or using a large bowl and handheld mixer, beat the softened unsalted butter on medium-high speed for 3-5 minutes until very pale and fluffy. Add the Nutella and beat until fully combined and smooth.
-
- Add Sugar & Cocoa: Sift the powdered sugar (start with 3 cups) and optional cocoa powder together. With the mixer on low, gradually add the sugar mixture to the butter/Nutella mixture, alternating with small amounts of the heavy cream or milk. Mix until incorporated.
-
- Whip to Perfection: Add the vanilla extract and salt. Increase the mixer speed to medium-high and beat for another 2-3 minutes until the frosting is light, airy, and exceptionally smooth. Scrape down the bowl frequently. If the frosting is too stiff, add more cream/milk one teaspoon at a time. If too soft, add more sifted powdered sugar ¼ cup at a time, or chill briefly.
-
- Prepare the Crunchy Wafer Layer: In a medium bowl, combine the crushed wafer cookies/cones and the finely chopped toasted hazelnuts. Add the ¼ cup of Nutella and stir gently until the dry ingredients are just coated and slightly clumped together. You don’t want a paste, just enough Nutella to help it hold together slightly. Set aside.
Part 3: Assembling the Ferrero Rocher Cake
-
- Level the Cakes (Optional but Recommended): Once completely cool, use a long serrated knife or cake leveler to trim the domed tops off the cake layers for a flat, stable surface. Save the scraps!
-
- Prepare Serving Plate: Place a small dab of Nutella buttercream in the center of your cake stand or serving plate to anchor the cake. Consider placing strips of parchment paper under the edges of the first layer to catch drips while frosting (pull out gently after frosting).
-
- First Layer: Place one cake layer, cut-side up, on the plate. Spread a generous, even layer of Nutella buttercream over the top (about ½ – ¾ inch thick).
-
- Add the Crunch: Carefully sprinkle about half of the prepared crunchy wafer-hazelnut mixture evenly over the buttercream layer, pressing it down very gently just to adhere.
-
- Second Layer: Place the second cake layer on top, cut-side down. Gently press to level. Spread another generous layer of Nutella buttercream. Sprinkle the remaining half of the crunchy wafer-hazelnut mixture over the frosting, gently pressing to adhere.
-
- Third Layer: Place the final cake layer on top, cut-side down. Gently press to ensure the cake is level.
-
- Crumb Coat: Apply a thin, even layer of the Nutella buttercream over the entire cake (top and sides). This traps crumbs and doesn’t need to be perfect. Use an offset spatula for smoothing. Refrigerate the crumb-coated cake for at least 30 minutes (or freeze for 15 mins) until the frosting is firm. This step ensures a clean final coat.
-
- Final Frosting: Apply the remaining Nutella buttercream generously over the chilled crumb coat. Use an offset spatula for the top and an offset spatula or bench scraper for smooth sides. You can create swirls on top or textured patterns on the sides.
-
- Optional Chocolate Drip (Ganache): If desired, prepare the ganache. Place chocolate chips/chopped chocolate in a heatproof bowl. Heat the heavy cream in a small saucepan or microwave until just simmering (not boiling). Pour the hot cream over the chocolate. Let it sit for 3-5 minutes without stirring. Then, gently whisk until smooth and glossy. Let the ganache cool slightly until it’s thickened but still pourable (cool enough not to melt the buttercream on contact – test on a small hidden spot if unsure). Carefully spoon or pour the ganache around the top edge of the chilled cake, letting it drip down the sides. You can then spread a thin layer over the remaining exposed top if desired. Let the drip set slightly (you can chill the cake briefly again).
-
- Garnish: This is where the magic happens!
-
- Press chopped toasted hazelnuts around the base of the cake.
-
- Arrange whole Ferrero Rocher chocolates on top. You can place them around the edge, perhaps on dollops of remaining frosting, or create a pattern in the center. Some people like to halve them carefully with a sharp knife to show the inside.
-
- Sprinkle extra chopped hazelnuts or even some leftover wafer crumbs over the top.
-
- Garnish: This is where the magic happens!
-
- Chill Before Serving (Recommended): Chill the fully decorated cake in the refrigerator for at least 30-60 minutes before slicing. This helps the frosting and ganache set firmly for cleaner cuts.
Nutrition
- Serving Size: one normal portion
- Calories: 700-950