")

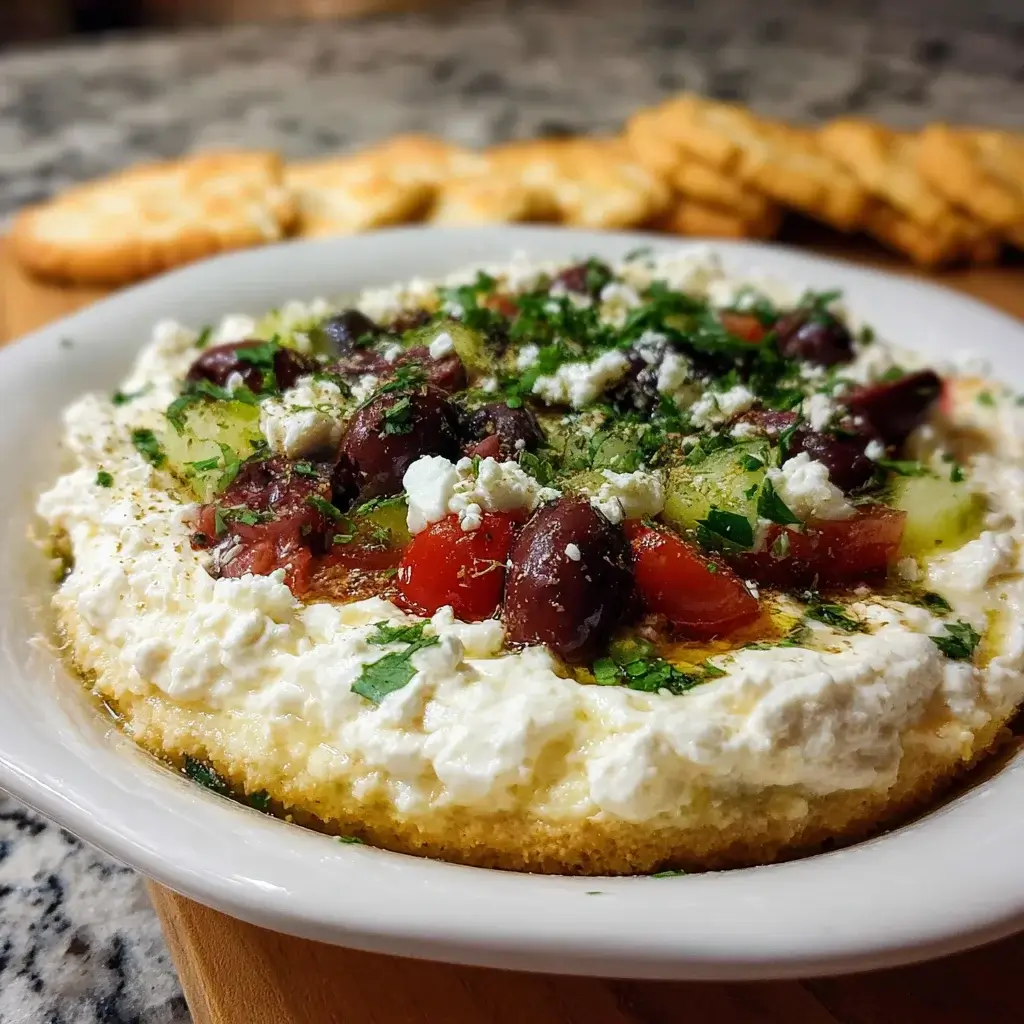
Of all the dishes in the pantheon of party food, the layered dip reigns supreme. For years, the classic seven-layer Mexican dip was the undisputed king of my potluck contributions, but then I discovered its brighter, fresher, and dare I say, more sophisticated Mediterranean cousin. The first time I brought this Greek Layered Dip to a summer barbecue, it was a revelation. I placed the glass trifle bowl on the table, and it was like a magnet. The vibrant layers—the creamy beige of hummus, the crisp white of the tzatziki, the flecks of green cucumber, the ruby red tomatoes, and the dramatic pops of purple olives and snowy feta—were a feast for the eyes before anyone had even picked up a pita chip. The usual hum of party chatter quieted as people took their first bite, followed by a chorus of “Oh, wow, what is this?” It was a smash hit. The cool, refreshing flavors were a perfect antidote to the summer heat, and it felt both indulgent and incredibly wholesome. Since that day, this has become my signature dish, the one I’m always asked to bring, and the one that is always, without fail, scraped clean by the end of the night.
Why This Greek Layered Dip Will Be Your New Party Go-To
This recipe is more than just a dip; it’s a centerpiece. It’s an easy, no-cook solution that delivers a massive “wow” factor with minimal culinary skill required. If you can spread, sprinkle, and chop, you can make this showstopper. Here’s why it deserves a prime spot at your next gathering.
- A Feast for the Eyes: Let’s be honest, we eat with our eyes first. Served in a glass dish or trifle bowl, the distinct, colorful layers are visually stunning. It immediately signals to your guests that this isn’t just an afterthought appetizer; it’s something special. The vibrant colors of the Mediterranean—red, white, green, and purple—make it a beautiful and inviting focal point on any buffet table.
- Incredibly Fresh and Flavorful: Unlike many heavy, cheese-laden party dips, this one is bursting with fresh, bright flavors. The creamy hummus, tangy tzatziki, crisp cucumber, juicy tomatoes, and briny olives create a complex and refreshing taste experience. It’s satisfying without being heavy, making it the perfect appetizer for any season, but especially for warm-weather gatherings.
- No Cooking Required: This is perhaps its greatest selling point for a busy host. There is absolutely no cooking involved. You don’t need to turn on your oven or stove, making it an ideal dish for hot summer days or for when your oven is already occupied with a main course. The entire process is one of simple assembly.
- Crowd-Pleasing and (Mostly) Healthy: This dip caters to a wide range of palates and dietary preferences. It’s vegetarian and packed with protein from the hummus and yogurt, and loaded with fresh vegetables. When served with veggie sticks alongside pita bread, it offers a fantastic gluten-free and low-carb option for your guests, ensuring there’s something delicious for everyone.
- Perfect for Making Ahead: As a host, anything you can prepare in advance is a gift. This dip can be assembled hours before your party, and in fact, it gets even better as the flavors have a chance to meld in the refrigerator. This frees you up to focus on other last-minute preparations, knowing you have a guaranteed showstopper ready to go.
The Anatomy of a Perfect Greek Layer Dip: Deconstructing the Layers
The magic of this dip is how the individual layers, each delicious on their own, come together to create something even greater. Understanding the role of each layer is key to building the perfect dip.
Layer 1: The Foundation (Hummus)
The base layer of hummus provides a sturdy, creamy foundation that anchors the entire dip. It has a rich, earthy flavor from the chickpeas and tahini that provides a perfect savory starting point.
- The Best Choice: A high-quality, store-bought classic or roasted garlic hummus works perfectly and is a fantastic time-saver. If you have a favorite homemade hummus recipe, by all means, use it! The key is a smooth, thick consistency.
Layer 2: The Creamy Tang (Tzatziki or Seasoned Greek Yogurt)
This layer provides a cool, creamy, and tangy contrast to the earthy hummus. It’s the refreshing heart of the dip.
- Two Paths to Success:
- Authentic Tzatziki: For the most authentic flavor, you can make or buy tzatziki sauce. The key to homemade tzatziki is grating and then squeezing all the excess water from the cucumber to prevent a watery sauce.
- The Quick & Easy Method (My Go-To): A fantastic and faster alternative is to use plain Greek yogurt seasoned with lemon juice, garlic, and dill. It provides the same creamy tang with less prep work. Use full-fat Greek yogurt for the richest, thickest result.
Layer 3 & 4: The Fresh Crunch (Cucumber and Red Onion)
These layers provide essential texture and fresh flavor.
- Cucumber: Finely diced English or Persian cucumbers add a cool, watery crunch. It’s important to pat them dry after dicing to minimize excess moisture.
- Red Onion: A sprinkle of finely minced red onion adds a sharp, piquant bite that cuts through the creamy layers beautifully. Soaking the minced onion in cold water for 10 minutes can mellow its raw bite if you prefer a milder flavor.
Layer 5: The Sweet Juiciness (Tomatoes)
This layer adds a pop of color and a burst of sweet, juicy flavor.
- The Best Tomatoes: Roma tomatoes are an excellent choice because they have fewer seeds and less water content than other varieties, which helps keep the dip from becoming soggy. Cherry or grape tomatoes, quartered, also work beautifully. The key is to de-seed them and pat them dry.
Layer 6: The Salty Brine (Olives and Feta)
This is the power couple of Greek flavor, providing the signature salty, briny finish.
- Olives: Pitted Kalamata olives are the gold standard here. Their rich, fruity, and intensely savory flavor is unmistakable. Slice them to ensure you get a bit of olive in every scoop.
- Feta Cheese: This brined sheep’s milk cheese adds a salty, tangy creaminess. For the best flavor and texture, buy a block of feta packed in brine and crumble it yourself. Pre-crumbled feta is often drier and contains anti-caking agents that can dull its flavor.
Layer 7: The Final Flourish (Herbs and Garnish)
This final touch brings everything together.
- Fresh Herbs: A generous sprinkle of freshly chopped dill or parsley adds a final layer of fresh, herbaceous aroma and flavor.
- Olive Oil: A light drizzle of a good quality extra virgin olive oil over the top adds a touch of richness and a beautiful sheen.
Complete Greek Layered Dip Recipe
Here is the full recipe, broken down by layer for easy assembly.
Yields: 10-12 servings
Prep time: 20-25 minutes
Chill time: 30 minutes (optional, but recommended)
Ingredients
- Layer 1: Hummus
- 1 container (10-12 oz) Classic or Roasted Garlic Hummus
- Layer 2: Creamy Yogurt Spread
- 1 cup Full-Fat Plain Greek Yogurt
- 1 tbsp Fresh Lemon Juice
- 1 clove Garlic, finely minced
- 1 tbsp Fresh Dill, chopped (or 1 tsp dried dill)
- Pinch of Salt and Pepper
- Layer 3: Cucumber
- 1 cup English Cucumber, finely diced and patted dry
- Layer 4: Red Onion
- ¼ cup Red Onion, finely minced
- Layer 5: Tomatoes
- 1 cup Roma Tomatoes, seeded, diced, and patted dry
- Layer 6: Olives & Feta
- ½ cup Kalamata Olives, pitted and roughly chopped
- 1 cup Crumbled Feta Cheese (from a block is best)
- Layer 7: Garnish
- 2 tbsp Fresh Parsley or Dill, chopped
- 1 tbsp Extra Virgin Olive Oil, for drizzling
Step-by-Step Instructions
Assembling this dip is as easy as 1-2-3…7!
Step 1: Choose Your Dish
Select a 2-quart glass dish, a 9-inch pie plate, or a trifle bowl. A clear glass dish is highly recommended to showcase the beautiful layers.
Step 2: Layer 1 – The Hummus
Spread the hummus evenly across the bottom of your chosen dish, creating a smooth, flat base.
Step 3: Layer 2 – The Creamy Yogurt
In a small bowl, combine the Greek yogurt, lemon juice, minced garlic, chopped dill, salt, and pepper. Stir until smooth. Carefully spread this mixture over the hummus layer, extending it to the edges of the dish.
Step 4: Layer 3 – The Cucumber
Sprinkle the finely diced and thoroughly patted-dry cucumber evenly over the yogurt layer.
Step 5: Layer 4 – The Red Onion
Sprinkle the finely minced red onion over the cucumber layer.
Step 6: Layer 5 – The Tomatoes
Distribute the seeded and diced tomatoes evenly over the red onion.
Step 7: Layer 6 – The Olives and Feta
Sprinkle the chopped Kalamata olives over the tomatoes, followed by an even, generous layer of the crumbled feta cheese.
Step 8: Layer 7 – The Garnish
Just before serving, sprinkle the top with the fresh chopped parsley or dill and finish with a light drizzle of extra virgin olive oil.
Step 9: Chill (Optional but Recommended)
Cover the dip and refrigerate for at least 30 minutes to allow the flavors to meld together. This step makes a noticeable difference!
Nutrition Facts
This information is an estimate and can vary based on the specific brands of hummus, yogurt, and cheese used.
- Servings: 10-12
- Calories per serving: Approximately 150-180 kcal (not including dippers)
This dip is a great source of protein, healthy fats, and fiber.
Preparation Time
- Active Prep Time: 20-25 minutes (for chopping and assembly)
- Chill Time: 30 minutes
- Total Time: Approximately 50-55 minutes
How to Serve Your Greek Layered Dip
The dip is the star, but the dippers are its essential supporting cast. Offer a variety to please everyone.
- The Classic Choice:
- Warm Pita Bread: Cut fluffy Greek-style pitas into wedges, brush them lightly with olive oil, sprinkle with a little oregano, and warm them in the oven or on a grill pan for a few minutes.
- The Crunchy Crew:
- Pita Chips: Store-bought pita chips are a perfect, sturdy vehicle for this hearty dip.
- Bagel Chips or Crostini: Offer a different kind of crunch and flavor.
- The Healthy & Low-Carb Options:
- Cucumber Spears: A cool, refreshing, and perfectly thematic choice.
- Bell Pepper Strips: Red, yellow, and orange bell peppers add color and a sweet crunch.
- Carrot and Celery Sticks: Classic, sturdy dippers that everyone loves.
- Endive Leaves: Their natural boat shape makes them an elegant and edible scoop.
Additional Tips for Dip Perfection
These small details will elevate your dip from great to absolutely unforgettable.
- The Dry Ingredient Rule: This is the most important tip for preventing a watery dip. You must pat your diced cucumbers and tomatoes dry with a paper towel before adding them to the layers. This removes excess water that can pool at the bottom of the dish.
- A Glass Dish is Your Best Friend: The visual appeal of this dip is half the fun. Using a glass pie plate, a square baking dish, or a trifle bowl allows everyone to see the beautiful, distinct layers you’ve created.
- Chill for Flavor Meld: Don’t skip the chilling step if you have the time. That 30 minutes in the refrigerator allows the garlic, lemon, and herbs to infuse into the yogurt and the flavors of the different layers to get to know each other, resulting in a more cohesive and delicious final product.
- Crumble Your Own Feta: It bears repeating: buy a block of feta cheese packed in brine. The flavor is saltier, tangier, and creamier than the pre-crumbled varieties, which often contain anti-caking powders that can give them a slightly gritty texture.
- Don’t Be Shy with the Top Layer: The top layer is what everyone sees first, so make it beautiful. Be generous with the feta, olives, and fresh herbs to create a vibrant and abundant-looking surface.
Frequently Asked Questions (FAQ)
1. Can I make this dip ahead of time?
Yes! You can assemble the entire dip up to 8 hours in advance. For the absolute best result, I recommend assembling all the layers, covering it tightly, and then adding the final garnish of fresh herbs and olive oil just before serving to keep them looking their freshest.
2. How long will leftovers last in the refrigerator?
Leftovers can be stored in an airtight container in the refrigerator for 2-3 days. Be aware that the dip will become progressively more watery over time as the vegetables release their moisture, but it will still be delicious.
3. Can I make this dip low-carb or keto-friendly?
Absolutely. The dip itself is relatively low in carbohydrates. The key is to serve it with appropriate dippers. Instead of pita bread or chips, offer a platter of low-carb vegetables like cucumber spears, bell pepper strips, celery sticks, and cauliflower or broccoli florets.
4. Can I use a different kind of hummus?
Yes, feel free to get creative with the hummus layer. A roasted red pepper hummus would add a lovely smoky sweetness, while a lemon or pine nut hummus would also be delicious. Just choose one with a flavor profile that you think will complement the other Greek ingredients.
5. My dip looks watery at the bottom. What went wrong?
This is almost always due to excess moisture from the vegetables. The likely culprits are not patting the diced cucumbers and tomatoes dry enough, or not squeezing the water out of the cucumber if you made a true tzatziki sauce for the second layer. Being diligent about removing this excess water is the key to a perfect, non-watery dip

Greek Layered Dip recipe
Ingredients
-
Layer 1: Hummus
-
1 container (10-12 oz) Classic or Roasted Garlic Hummus
-
-
Layer 2: Creamy Yogurt Spread
-
1 cup Full-Fat Plain Greek Yogurt
-
1 tbsp Fresh Lemon Juice
-
1 clove Garlic, finely minced
-
1 tbsp Fresh Dill, chopped (or 1 tsp dried dill)
-
Pinch of Salt and Pepper
-
-
Layer 3: Cucumber
-
1 cup English Cucumber, finely diced and patted dry
-
-
Layer 4: Red Onion
-
¼ cup Red Onion, finely minced
-
-
Layer 5: Tomatoes
-
1 cup Roma Tomatoes, seeded, diced, and patted dry
-
-
Layer 6: Olives & Feta
-
½ cup Kalamata Olives, pitted and roughly chopped
-
1 cup Crumbled Feta Cheese (from a block is best)
-
-
Layer 7: Garnish
-
2 tbsp Fresh Parsley or Dill, chopped
-
1 tbsp Extra Virgin Olive Oil, for drizzling
-
Instructions
Step 1: Choose Your Dish
Select a 2-quart glass dish, a 9-inch pie plate, or a trifle bowl. A clear glass dish is highly recommended to showcase the beautiful layers.
Step 2: Layer 1 – The Hummus
Spread the hummus evenly across the bottom of your chosen dish, creating a smooth, flat base.
Step 3: Layer 2 – The Creamy Yogurt
In a small bowl, combine the Greek yogurt, lemon juice, minced garlic, chopped dill, salt, and pepper. Stir until smooth. Carefully spread this mixture over the hummus layer, extending it to the edges of the dish.
Step 4: Layer 3 – The Cucumber
Sprinkle the finely diced and thoroughly patted-dry cucumber evenly over the yogurt layer.
Step 5: Layer 4 – The Red Onion
Sprinkle the finely minced red onion over the cucumber layer.
Step 6: Layer 5 – The Tomatoes
Distribute the seeded and diced tomatoes evenly over the red onion.
Step 7: Layer 6 – The Olives and Feta
Sprinkle the chopped Kalamata olives over the tomatoes, followed by an even, generous layer of the crumbled feta cheese.
Step 8: Layer 7 – The Garnish
Just before serving, sprinkle the top with the fresh chopped parsley or dill and finish with a light drizzle of extra virgin olive oil.
Step 9: Chill (Optional but Recommended)
Cover the dip and refrigerate for at least 30 minutes to allow the flavors to meld together. This step makes a noticeable difference!
Nutrition
- Serving Size: one normal portion
- Calories: 150-180

