")

I’m a firm believer that “taco night” should be an easy, joyous occasion, not a logistical challenge involving a mountain of dishes. For the longest time, though, my attempts at a one-pot taco-inspired meal were… well, a bit lackluster. Then came the revelation of One-Pot Cheesy Taco Rice. I was initially skeptical – could rice really cook perfectly in the saucy, cheesy, taco-seasoned goodness without becoming a sticky mess or a flavorless mush? The first time I tried this recipe, the aroma alone was enough to get my family excited. As the rice simmered away, absorbing all those delicious taco flavors, and the cheese melted into a glorious, gooey blanket on top, I knew I was onto something special. The verdict? An absolute triumph! My kids, who can be notoriously picky, devoured it. My partner, a taco purist, was genuinely impressed by how much taco flavor was packed into each bite of rice. It’s got all the satisfying elements of a taco – the seasoned ground meat (or veggie alternative), the zesty tomatoes, the melty cheese – but with the comforting, hearty base of perfectly cooked rice, all achieved with minimal cleanup. It’s become our go-to for busy weeknights when we’re craving those taco flavors but need something quick, easy, and utterly satisfying.
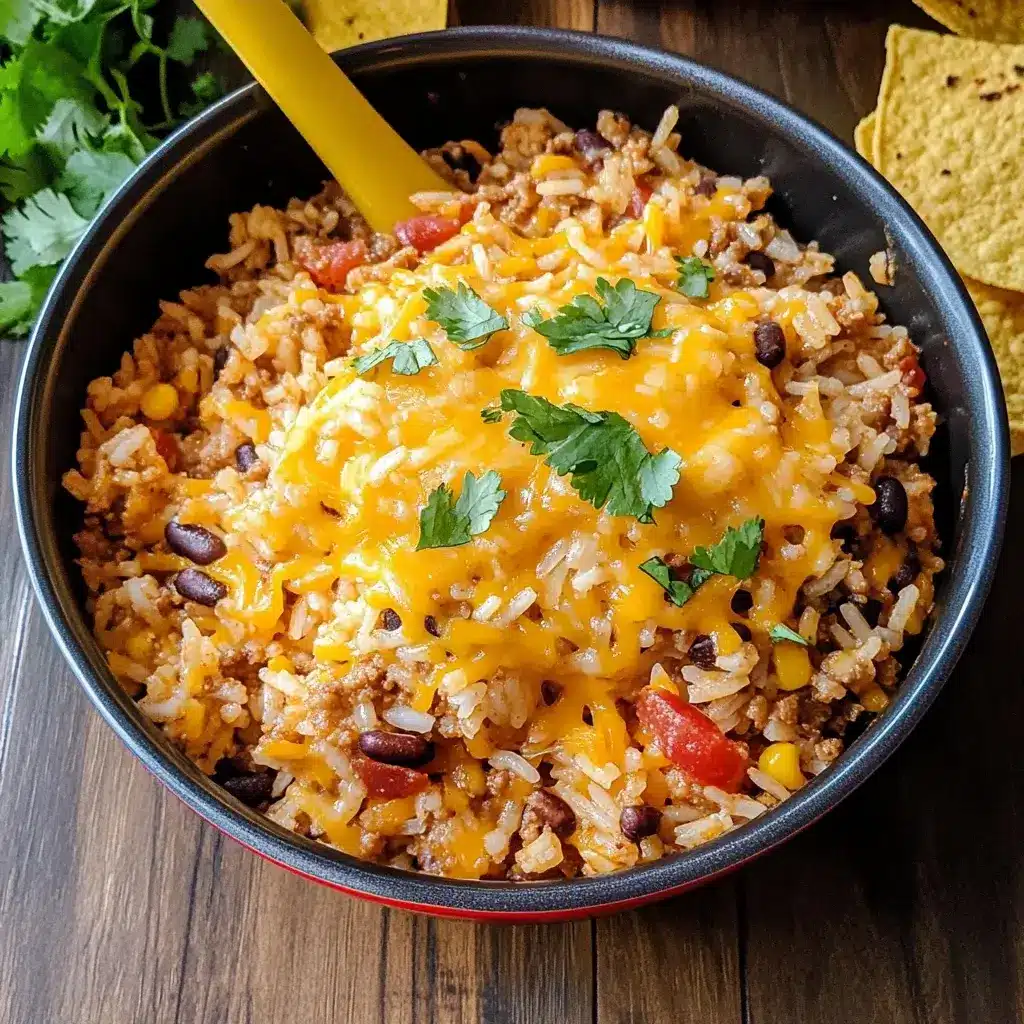
The Ultimate One-Pot Cheesy Taco Rice: A Weeknight Wonder
Say hello to your new favorite weeknight dinner: One-Pot Cheesy Taco Rice! This dish delivers all the beloved flavors of tacos – seasoned ground meat, zesty salsa, savory spices, and gooey melted cheese – combined with perfectly cooked, flavorful rice, all made in a single pot. It’s a hearty, satisfying, and incredibly easy meal that minimizes cleanup without compromising on taste. Perfect for busy families, this recipe is also wonderfully customizable, allowing you to adjust the spice level and incorporate your favorite taco toppings. Get ready for a flavor fiesta that will have everyone asking for seconds!
Ingredients: Your Passport to Taco Rice Paradise
Gather these simple yet flavorful ingredients to create this crowd-pleasing dish.
- For the Base & Protein:
- 1 tablespoon olive oil or avocado oil
- 1 pound (450g) ground beef (80/20 or 85/15 recommended), ground turkey, or ground chicken
- Vegetarian Option: 1 (15-ounce) can black beans, rinsed and drained, PLUS 1 (15-ounce) can pinto beans, rinsed and drained, OR 12-16 ounces plant-based ground “meat”
- 1 medium yellow onion, finely chopped (about 1 cup)
- 1 bell pepper (any color), cored, seeded, and chopped (about 1 cup)
- 2-3 cloves garlic, minced
- For the Taco Flavor & Rice:
- 1 packet (1 ounce / 28g) taco seasoning (low-sodium preferred, or 2-3 tablespoons homemade taco seasoning)
- 1 can (10 ounces / 283g) diced tomatoes with green chilies (like Ro*Tel), undrained
- 1 cup (240ml) salsa of your choice (mild, medium, or hot)
- 3 cups (720ml) chicken broth or beef broth (or vegetable broth for vegetarian option), low-sodium preferred
- 1 1/2 cups (300g) long-grain white rice, rinsed thoroughly until water runs mostly clear
- For the Cheesy Topping & Garnish:
- 1 1/2 – 2 cups (170-226g) shredded cheddar cheese, Monterey Jack cheese, or a Mexican cheese blend
- Optional Toppings for Serving:
- Chopped fresh cilantro
- Sour cream or plain Greek yogurt
- Diced avocado or guacamole
- Sliced green onions
- Pickled jalapeños
- Crushed tortilla chips
- Extra salsa or pico de gallo
A Note on Ingredients:
- Ground Meat/Vegetarian Protein: Choose your favorite. If using ground meat, draining excess fat after browning is recommended for a less greasy dish. For vegetarian, a combination of beans adds great texture and protein; plant-based grounds also work very well.
- Taco Seasoning: Use your favorite store-bought packet or a homemade blend. If your seasoning is very salty, you may not need to add extra salt to the dish.
- Diced Tomatoes with Green Chilies (Ro*Tel): This adds a nice kick and flavor. If you prefer less heat, you can use a can of plain diced tomatoes and add a small (4-ounce) can of mild diced green chilies separately, or just use plain diced tomatoes.
- Salsa: Your choice of salsa will significantly impact the flavor profile. Use one you love!
- Broth: Using broth instead of water adds much more flavor to the rice.
- Rice: Long-grain white rice works best for this recipe, absorbing the flavors well and cooking to a fluffy texture. Rinsing the rice removes excess starch, preventing it from becoming too sticky.
- Cheese: A good melting cheese is key. Pre-shredded is convenient, but shredding your own from a block often results in better melting.
Step-by-Step Instructions: Your Path to One-Pot Perfection
This recipe simplifies taco night without sacrificing any of the deliciousness.
Part 1: Build the Flavor Base
- Brown Meat & Sauté Aromatics: Heat the olive oil in a large, heavy-bottomed pot or Dutch oven (at least 5-6 quart capacity with a lid) over medium-high heat.
- If using ground meat: Add the ground meat and cook, breaking it apart with a spoon, until browned, about 5-7 minutes. Drain off any excess fat.
- Add the chopped onion and bell pepper to the pot with the browned meat (or to the empty pot if starting vegetarian). Sauté for 5-7 minutes, or until the vegetables are softened.
- Stir in the minced garlic and cook for another 1-2 minutes, until fragrant.
- If using plant-based ground “meat”: Add it with the onions and bell peppers and cook according to package directions, breaking it apart.
- Add Seasoning & Tomatoes: Sprinkle the taco seasoning over the meat/vegetable mixture. Stir well to coat everything and cook for 1 minute more, allowing the spices to toast slightly.
- Stir in the undrained can of diced tomatoes with green chilies and your chosen salsa. Mix well.
Part 2: Cook the Rice
- Add Broth and Rice: Pour in the broth and add the rinsed long-grain white rice.
- If using canned beans (vegetarian option): Stir them in now.
- Stir everything together, ensuring the rice is mostly submerged in the liquid.
- Bring to a Simmer & Cook: Bring the mixture to a gentle simmer over medium-high heat. Once simmering, reduce the heat to low, cover the pot tightly with a lid, and cook for 18-22 minutes, or until most of the liquid has been absorbed and the rice is tender.
- Important: Do not lift the lid or stir the rice during this cooking period. This allows the rice to steam properly and cook evenly.
Part 3: Get Cheesy & Finish
- Check Rice: After 18-22 minutes, remove the lid. The rice should be tender, and most of the liquid absorbed. If there’s still a lot of visible liquid, cover and cook for another 3-5 minutes.
- Add Cheese: Turn off the heat. Sprinkle the shredded cheese evenly over the top of the taco rice.
- Melt Cheese & Rest: Replace the lid on the pot and let it stand, off the heat, for 5-10 minutes. This allows the cheese to melt beautifully and the flavors to meld further. The residual heat will do all the work.
Part 4: Serve with Toppings
- Fluff and Serve: After resting, gently fluff the rice mixture with a fork, trying to keep some of the melted cheese on top.
- Garnish and Enjoy: Ladle the One-Pot Cheesy Taco Rice into bowls. Set out a variety of optional toppings (chopped cilantro, sour cream, avocado, etc.) so everyone can customize their bowl.
Nutritional Snapshot: A Satisfying and Flavorful Meal
This dish offers a good balance of protein, carbohydrates, and flavor. The nutritional information is an approximation and will vary based on specific ingredients used (type of meat/protein, fat content, type of cheese, etc.) and final portion sizes.
- Servings: This recipe makes approximately 4-6 generous servings.
- Calories per serving (approximate): 450-600 calories (depending heavily on protein choice, cheese amount, and toppings).
This is a hearty meal that can be made more or less indulgent based on your ingredient choices and toppings.
Time Investment: Quick Enough for Any Night
One of the biggest draws of this recipe is its efficiency.
- Active Preparation Time: Approximately 15-20 minutes (chopping vegetables, browning meat).
- Cooking Time:
- Sautéing & building base: 10-15 minutes.
- Simmering rice: 18-22 minutes.
- Resting/melting cheese: 5-10 minutes.
- Total Time: Approximately 45 minutes to 1 hour.
Perfect for when you need a delicious dinner on the table without a lot of fuss!
How to Serve: Dress Up Your Taco Rice Fiesta
This dish is fantastic on its own but truly shines when customized with toppings.
- In Bowls: Serve generously in individual bowls.
- Topping Bar: The best way to serve is with a “topping bar” so everyone can build their perfect bowl. Offer a variety of:
- Creamy: Sour cream, plain Greek yogurt, crumbled cotija cheese, or a drizzle of crema.
- Fresh & Zesty: Chopped fresh cilantro, diced avocado or guacamole, pico de gallo, extra salsa, sliced green onions, shredded lettuce, diced fresh tomatoes.
- Crunchy: Crushed tortilla chips (a must for many!), toasted pepitas.
- Spicy: Pickled jalapeños, your favorite hot sauce.
- As a Filling: Leftovers (if there are any!) can be fantastic as a filling for:
- Burritos
- Quesadillas
- Stuffed bell peppers (bake until peppers are tender)
- Party Food: Double the recipe (if your pot is large enough) for a crowd-pleasing dish at casual gatherings or potlucks.
Pro Tips for Taco Rice Triumph: Elevate Your One-Pot Game
- Rinse Your Rice: Don’t skip rinsing the long-grain white rice under cold water until it runs mostly clear. This removes excess surface starch, preventing the rice from becoming overly sticky and gummy, leading to a fluffier result.
- Don’t Peek While Rice Cooks!: Once you’ve brought the mixture to a simmer, covered it, and reduced the heat, resist the temptation to lift the lid and stir. This allows the rice to steam properly and cook evenly. Lifting the lid releases steam and can prolong cooking time or result in unevenly cooked rice.
- Brown Your Meat (or Veggie Ground) Well: If using ground meat or a plant-based ground, take the time to brown it properly. This develops a deeper, more savory flavor that forms a crucial base for the dish. Don’t forget to drain excess fat from ground meat.
- Use Low-Sodium Broth and Taco Seasoning (If Possible): This gives you more control over the final saltiness of the dish. You can always add more salt if needed, but it’s hard to take it away. Taste and adjust seasoning before adding the cheese.
- Resting is Key for Melty Cheese and Flavor Melding: After adding the cheese and turning off the heat, let the pot sit, covered, for at least 5-10 minutes. This not only ensures the cheese melts perfectly into a gooey blanket but also allows all the flavors to meld together beautifully, making the dish even more delicious.
Frequently Asked Questions (FAQ) About One-Pot Cheesy Taco Rice
Q1: Can I use brown rice instead of white rice?
A1: Yes, you can use long-grain brown rice, but you’ll need to adjust the cooking time and liquid. Brown rice typically requires more liquid (about 1/2 to 3/4 cup extra broth for this recipe) and a longer cooking time (around 35-45 minutes, covered, on low heat). Check the package directions for your specific brown rice. Add the cheese in the last few minutes of cooking or during the resting period as directed.
Q2: Can I make this dish spicier or milder?
A2: Absolutely!
* To make it spicier: Use a hot salsa, add a pinch or two of cayenne pepper or red pepper flakes along with the taco seasoning, use a spicier taco seasoning blend, include a finely diced jalapeño (sautéed with the onions and peppers), or serve with plenty of hot sauce and pickled jalapeños as toppings.
* To make it milder: Use a mild salsa, ensure your taco seasoning is mild, use plain diced tomatoes instead of RoTel (or use the mild RoTel version), and avoid spicy toppings.
Q3: What if I don’t have diced tomatoes with green chilies (Ro*Tel)?
A3: No problem! You can substitute a 14.5-ounce can of plain diced tomatoes. If you still want a bit of that green chili flavor and mild heat, you can add a small (4-ounce) can of diced mild green chilies (drained) along with the plain diced tomatoes. Or, simply use the plain diced tomatoes for a less zesty, non-spicy tomato base.
Q4: Can I prepare any parts of this dish ahead of time?
A4: Yes, you can do some prep work to save time. You can chop the onion, bell pepper, and garlic ahead of time and store them in an airtight container in the refrigerator. You can also pre-shred your cheese. This will make the assembly and cooking process even quicker on a busy night.
Q5: How do I store and reheat leftovers?
A5: Store leftover One-Pot Cheesy Taco Rice in an airtight container in the refrigerator for up to 3-4 days. To reheat, you can microwave individual portions until heated through, stirring once or twice. For larger amounts, you can reheat it in a pot on the stovetop over medium-low heat, adding a splash of broth or water to prevent sticking and help rehydrate the rice if it seems dry. Stir occasionally until warmed through.
This One-Pot Cheesy Taco Rice is a true weeknight warrior – simple, flavorful, and guaranteed to please the whole family. Enjoy the ease and deliciousness of this taco-inspired favorite!
Print
One Pot Cheesy Taco Rice recipe
Ingredients
-
- For the Base & Protein:
-
- 1 tablespoon olive oil or avocado oil
-
- 1 pound (450g) ground beef (80/20 or 85/15 recommended), ground turkey, or ground chicken
-
- Vegetarian Option: 1 (15-ounce) can black beans, rinsed and drained, PLUS 1 (15-ounce) can pinto beans, rinsed and drained, OR 12-16 ounces plant-based ground “meat”
-
- 1 medium yellow onion, finely chopped (about 1 cup)
-
- 1 bell pepper (any color), cored, seeded, and chopped (about 1 cup)
-
- 2–3 cloves garlic, minced
-
- For the Base & Protein:
-
- For the Taco Flavor & Rice:
-
- 1 packet (1 ounce / 28g) taco seasoning (low-sodium preferred, or 2–3 tablespoons homemade taco seasoning)
-
- 1 can (10 ounces / 283g) diced tomatoes with green chilies (like Ro*Tel), undrained
-
- 1 cup (240ml) salsa of your choice (mild, medium, or hot)
-
- 3 cups (720ml) chicken broth or beef broth (or vegetable broth for vegetarian option), low-sodium preferred
-
- 1 1/2 cups (300g) long-grain white rice, rinsed thoroughly until water runs mostly clear
-
- For the Taco Flavor & Rice:
-
- For the Cheesy Topping & Garnish:
-
- 1 1/2 – 2 cups (170-226g) shredded cheddar cheese, Monterey Jack cheese, or a Mexican cheese blend
-
- Optional Toppings for Serving:
-
- Chopped fresh cilantro
-
- Sour cream or plain Greek yogurt
-
- Diced avocado or guacamole
-
- Sliced green onions
-
- Pickled jalapeños
-
- Crushed tortilla chips
-
- Extra salsa or pico de gallo
-
- Optional Toppings for Serving:
-
- For the Cheesy Topping & Garnish:
A Note on Ingredients:
-
- Ground Meat/Vegetarian Protein: Choose your favorite. If using ground meat, draining excess fat after browning is recommended for a less greasy dish. For vegetarian, a combination of beans adds great texture and protein; plant-based grounds also work very well.
-
- Taco Seasoning: Use your favorite store-bought packet or a homemade blend. If your seasoning is very salty, you may not need to add extra salt to the dish.
-
- Diced Tomatoes with Green Chilies (Ro*Tel): This adds a nice kick and flavor. If you prefer less heat, you can use a can of plain diced tomatoes and add a small (4-ounce) can of mild diced green chilies separately, or just use plain diced tomatoes.
-
- Salsa: Your choice of salsa will significantly impact the flavor profile. Use one you love!
-
- Broth: Using broth instead of water adds much more flavor to the rice.
-
- Rice: Long-grain white rice works best for this recipe, absorbing the flavors well and cooking to a fluffy texture. Rinsing the rice removes excess starch, preventing it from becoming too sticky.
-
- Cheese: A good melting cheese is key. Pre-shredded is convenient, but shredding your own from a block often results in better melting.
Instructions
-
- Brown Meat & Sauté Aromatics: Heat the olive oil in a large, heavy-bottomed pot or Dutch oven (at least 5-6 quart capacity with a lid) over medium-high heat.
-
- If using ground meat: Add the ground meat and cook, breaking it apart with a spoon, until browned, about 5-7 minutes. Drain off any excess fat.
-
- Add the chopped onion and bell pepper to the pot with the browned meat (or to the empty pot if starting vegetarian). Sauté for 5-7 minutes, or until the vegetables are softened.
-
- Stir in the minced garlic and cook for another 1-2 minutes, until fragrant.
-
- If using plant-based ground “meat”: Add it with the onions and bell peppers and cook according to package directions, breaking it apart.
-
- Brown Meat & Sauté Aromatics: Heat the olive oil in a large, heavy-bottomed pot or Dutch oven (at least 5-6 quart capacity with a lid) over medium-high heat.
-
- Add Seasoning & Tomatoes: Sprinkle the taco seasoning over the meat/vegetable mixture. Stir well to coat everything and cook for 1 minute more, allowing the spices to toast slightly.
-
- Stir in the undrained can of diced tomatoes with green chilies and your chosen salsa. Mix well.
Part 2: Cook the Rice
-
- Add Broth and Rice: Pour in the broth and add the rinsed long-grain white rice.
-
- If using canned beans (vegetarian option): Stir them in now.
-
- Add Broth and Rice: Pour in the broth and add the rinsed long-grain white rice.
-
- Stir everything together, ensuring the rice is mostly submerged in the liquid.
-
- Bring to a Simmer & Cook: Bring the mixture to a gentle simmer over medium-high heat. Once simmering, reduce the heat to low, cover the pot tightly with a lid, and cook for 18-22 minutes, or until most of the liquid has been absorbed and the rice is tender.
-
- Important: Do not lift the lid or stir the rice during this cooking period. This allows the rice to steam properly and cook evenly.
-
- Bring to a Simmer & Cook: Bring the mixture to a gentle simmer over medium-high heat. Once simmering, reduce the heat to low, cover the pot tightly with a lid, and cook for 18-22 minutes, or until most of the liquid has been absorbed and the rice is tender.
Part 3: Get Cheesy & Finish
-
- Check Rice: After 18-22 minutes, remove the lid. The rice should be tender, and most of the liquid absorbed. If there’s still a lot of visible liquid, cover and cook for another 3-5 minutes.
-
- Add Cheese: Turn off the heat. Sprinkle the shredded cheese evenly over the top of the taco rice.
-
- Melt Cheese & Rest: Replace the lid on the pot and let it stand, off the heat, for 5-10 minutes. This allows the cheese to melt beautifully and the flavors to meld further. The residual heat will do all the work.
Part 4: Serve with Toppings
-
- Fluff and Serve: After resting, gently fluff the rice mixture with a fork, trying to keep some of the melted cheese on top.
-
- Garnish and Enjoy: Ladle the One-Pot Cheesy Taco Rice into bowls. Set out a variety of optional toppings (chopped cilantro, sour cream, avocado, etc.) so everyone can customize their bowl.
Nutrition
- Serving Size: one normal portion
- Calories: 450-600