")

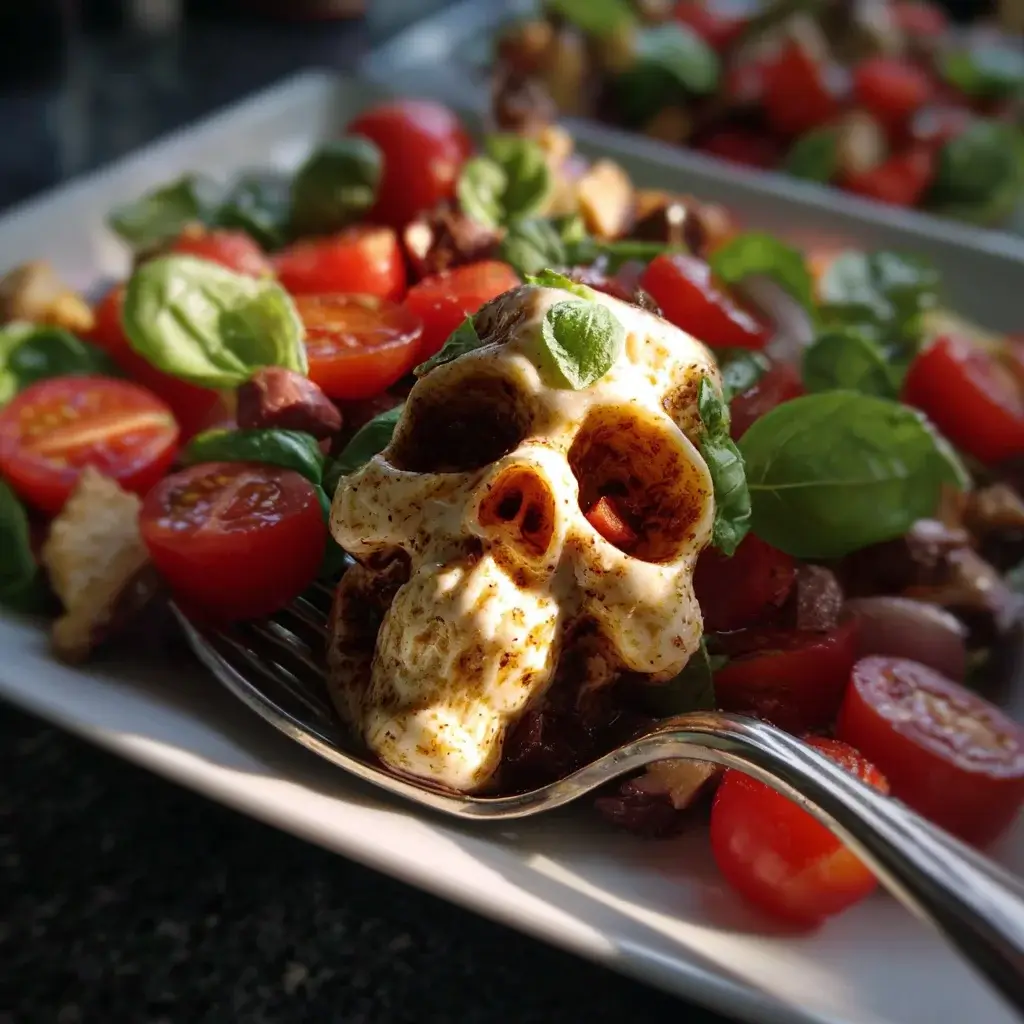
I’ve always believed that the best Halloween parties engage all the senses. You have the spooky music, the creepy decorations, the feel of fake spiderwebs on your skin. But for years, my food table was the one weak link—it was all sweets. I wanted a showstopper, a savory centerpiece that would make people gasp, then laugh, then immediately ask for the recipe. My quest led me down a rabbit hole of ghoulish gastronomy until I landed on an idea that was both macabre and magnificent: a Skull Salad. The first time I made it, I used a creamy cauliflower “potato” salad as my base, its pale color perfectly mimicking bone. I painstakingly molded it into a skull shape and used olives and almonds to create the hollow eyes and jagged teeth. When I carried it out to the party, a hush fell over the room. It was gruesome, it was glorious, and it was, without a doubt, the most talked-about dish of the night. The best part? After the initial shock, everyone dug in and discovered it was addictively delicious. It was the perfect savory counterpoint to the sugary treats, and it cemented itself as my signature Halloween dish forever.
Why This Ghoulish Creation is a Must-Make
This Skull Salad is more than just a clever gimmick; it’s a genuinely delicious, crowd-pleasing dish that will become the undead heart of your Halloween celebration. Here’s why this recipe is a stroke of spooky genius.
- The Ultimate Showstopper: Let’s be frank: the visual impact is off the charts. This isn’t just a dish; it’s a piece of edible art and an instant centerpiece. It generates a “wow” factor that no bowl of dip or platter of crackers ever could. It’s the dish your guests will be talking about and posting online long after the party is over.
- Deliciously Deceptive: Beneath its gruesome exterior lies an incredibly tasty and satisfying salad. We’re using a low-carb cauliflower “potato” salad base that’s creamy, tangy, and packed with flavor from bacon, cheese, and a zesty dressing. It’s so good, people will be shocked that the main ingredient is a healthy vegetable.
- Surprisingly Simple to Sculpt: While it looks like the work of a professional food artist, shaping this skull is much easier than it appears. The salad base is firm and moldable, acting like edible clay. With a little patience and our step-by-step guide, you’ll be able to craft a convincing cranium with ease.
- Keto-Friendly and Low-Carb: This recipe is naturally low in carbs and keto-friendly, making it a fantastic option for guests with dietary restrictions. It provides a hearty, savory option that allows everyone to indulge in the Halloween spirit without derailing their health goals.
- A Versatile and Adaptable Recipe: This recipe is a fantastic template. You can easily substitute the cauliflower with traditional boiled potatoes for a classic potato salad skull. You can also customize the mix-ins and seasonings to suit your taste, making it a new creation every time you make it.
Anatomy of the Skull: A Breakdown of the Key Ingredients
To create a believable and delicious skull, each component plays a crucial role, from the “bone” structure to the ghoulish facial features.
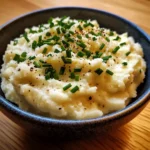
- The “Bone” (The Salad Base): The foundation of our skull is a creamy salad. We are using cauliflower for a few key reasons. When steamed and chopped, it has a texture remarkably similar to boiled potatoes but is much lighter and low-carb. Its naturally pale, off-white color is perfect for mimicking bone. For a more traditional approach, boiled and cooled Russet or Yukon Gold potatoes are a perfect substitute.
- The “Connective Tissue” (The Mix-ins): To give our salad flavor and texture, we add a variety of delicious mix-ins. Crispy, crumbled bacon adds a salty, smoky crunch. Shredded sharp cheddar cheese provides a savory bite and richness. Finely chopped celery and green onions add a necessary freshness and subtle crunch that balances the creaminess.
- The “Embalming Fluid” (The Creamy Dressing): The dressing binds everything together and provides the tangy, creamy flavor. A base of mayonnaise gives it richness. Sour cream or full-fat Greek yogurt adds a pleasant tang and lightens the texture. A touch of Dijon mustard provides a zesty kick, and a splash of apple cider vinegar brightens all the flavors.
- The “Facial Features” (The Garnishes): This is where the skull comes to life (or, rather, death). Black olives are the perfect medium for creating dark, hollow eye sockets and a nasal cavity. For the teeth, we use slivered almonds, which have a jagged, off-white appearance that looks incredibly realistic and unsettling.
The Macabre Masterpiece: The Complete Skull Salad Recipe
Here is the complete list of ingredients and instructions you’ll need to build your own ghastly, gourmet creation.
Ingredients
- For the Salad Base:
- 2 large heads of cauliflower (about 4-5 lbs total), cut into bite-sized florets
- 1 cup sharp cheddar cheese, shredded
- 8 slices of bacon, cooked until crispy and crumbled
- 2 celery stalks, finely chopped
- 4 green onions, thinly sliced (both white and green parts)
- For the Creamy Dressing:
- 1 cup real mayonnaise
- ½ cup sour cream or full-fat plain Greek yogurt
- 2 tablespoons Dijon mustard
- 1 tablespoon apple cider vinegar
- ½ teaspoon salt (or to taste)
- ½ teaspoon black pepper
- ¼ teaspoon garlic powder
- For the Skull Features:
- 2-3 whole pitted black olives
- ¼ cup slivered almonds
Step-by-Step Instructions: Assembling Your Edible Horror
Follow these detailed instructions carefully. The process is divided into preparing the salad and the artistic final assembly.
Part 1: Preparing the Cauliflower Salad Base
- Cook the Cauliflower: Steam the cauliflower florets until they are tender-crisp. You should be able to easily pierce them with a fork, but they should not be mushy. You can do this in a steamer basket on the stove (8-10 minutes) or in the microwave. To microwave, place the florets in a large microwave-safe bowl with a few tablespoons of water, cover, and cook on high for 6-8 minutes, stirring halfway through.
- Dry and Cool: This is a critical step. Drain the cooked cauliflower thoroughly. Spread it out on a baking sheet lined with paper towels and gently pat it dry. Let it cool completely to room temperature, and then chill in the refrigerator for at least 30 minutes. Starting with cool, dry cauliflower is the secret to a firm, non-watery salad.
- Chop the Cauliflower: Once cooled, finely chop the cauliflower into small, pea-sized pieces. You can do this by hand with a knife or by pulsing it very carefully in a food processor. Do not over-process, or you will end up with mush.
- Make the Dressing: In a small bowl, whisk together the mayonnaise, sour cream (or Greek yogurt), Dijon mustard, apple cider vinegar, salt, pepper, and garlic powder until smooth.
- Combine All Ingredients: In a large bowl, combine the chopped cauliflower, shredded cheddar cheese, crumbled bacon, chopped celery, and sliced green onions. Pour the dressing over the top and gently fold everything together until all the ingredients are evenly coated.
- Chill for Flavor and Form: Cover the bowl and chill the salad in the refrigerator for at least 2 hours, but preferably 4 hours or overnight. This chilling period is essential for two reasons: it allows the flavors to meld together, and it firms up the salad, which will make it much easier to mold into the skull shape.
Part 2: Sculpting and Decorating the Skull
- Choose Your Platter: Select a large, flat serving platter. A dark-colored platter (black or dark grey) will provide a dramatic contrast to the pale skull.
- Mound the Salad: Scoop the chilled salad mixture onto the center of the platter. Using your hands and a spatula, begin to mold the mound into a basic skull shape—slightly oval and taller at the top, tapering down towards the “jaw.”
- Create the Facial Contours: Use your fingers to create indentations for the eye sockets. Press in slightly on the sides to create defined “cheekbones.” Smooth the surface with the back of a spoon or a spatula.
- Add the Eyes and Nose: For the eye sockets, press two whole black olives firmly into the indentations you created. For the nasal cavity, you can cut a third olive in half lengthwise and press it, cut-side down, into the center of the face to create an inverted triangle shape.
- Create the Teeth: This is the final, creepy touch. Gently press the slivered almonds into the “mouth” area of the skull to create a row of jagged, uneven teeth. You can make a top and bottom row, leaving a slight gap in between.
- Final Chill and Serve: Once your skull is complete, you can place it back in the refrigerator, loosely covered, until you are ready to serve. This will help it stay firm.
Nutrition Facts
- Servings: 10-12 as a side dish
- Calories per serving: Approximately 280-320 kcal
Disclaimer: The nutritional information provided is an estimate based on the cauliflower version of the recipe. It can vary based on the specific ingredients used, such as the type of bacon and mayonnaise.
Preparation Time
- Prep Time: 25 minutes
- Cook Time: 10 minutes
- Chilling and Assembly Time: 2.5 hours (minimum)
- Total Time: Approximately 3 hours
How to Serve Your Ghastly Centerpiece
The presentation of your Skull Salad can elevate it from a simple dish to an entire scene.
Creating a Spooky Scene
- The Graveyard Bed: Before mounding your salad, create a “graveyard” on your platter. Use a bed of dark greens like spinach or arugula, or for a “dirt” effect, use finely crushed pumpernickel or rye breadcrumbs.
- Surrounded by “Guts”: For a truly gruesome display, surround the base of the skull with a vibrant red dip, like a roasted red pepper hummus or a spicy tomato salsa, to look like bloody entrails.
- The Butcher’s Board: Serve the skull on a large, rustic wooden cutting board. You can even place a meat cleaver nearby (for decorative purposes only, and safely away from guests!) for a macabre, butcher-shop vibe.
What to Serve Alongside the Skull
Your guests will need something to scoop up the delicious salad. Provide a variety of “dippers.”
- Crackers and Chips: A variety of crackers, pita chips, and tortilla chips are perfect. Look for dark-colored crackers (like pumpernickel or rye) or blue corn tortilla chips to enhance the spooky theme.
- Vegetable “Bones”: Serve with an assortment of fresh, raw vegetables for a healthier option. Carrot and celery sticks, bell pepper strips, and cucumber slices all work well. You can call them “finger bones” for extra thematic fun.
- Ghostly Toasts: Use a ghost-shaped cookie cutter to cut shapes out of sliced white bread. Brush them lightly with olive oil and toast them until golden brown to create crispy “ghost toasts.”
Additional Tips for a Killer Skull Salad
Here are five expert tips to ensure your macabre creation is a monstrous success.
- Dry Cauliflower is Non-Negotiable: We can’t stress this enough. After steaming, the cauliflower will hold a lot of water. If you don’t pat it dry and let it cool, you will have a soupy, watery salad that will not hold its skull shape. Take the extra 10 minutes for this step; it’s worth it.
- The Classic Potato Variation: To make a traditional potato salad skull, simply swap the 2 heads of cauliflower for 3 lbs of Russet or Yukon Gold potatoes. Peel them, boil them until tender, then cool, chop, and proceed with the recipe exactly as written.
- A Make-Ahead Master Plan: To save time on the day of your party, you can cook the cauliflower and bacon and chop the vegetables a day in advance. Store them in separate airtight containers in the fridge. You can also mix the dressing ahead of time. On party day, simply combine everything, chill for at least 2 hours, and then assemble the skull.
- Get Creative with the Features: Don’t feel limited to our suggestions for the face. You can use pimento-stuffed green olives for bloodshot eyes, a triangular piece of red bell pepper for the nose, or even small, rectangular pieces of jicama for more uniform, “perfect” teeth. Let your inner monster artist run wild!
- Don’t Be Afraid to Use Your Hands: While a spatula is great for the initial shaping, your hands are the best tools for sculpting the fine details of the skull. Don’t be afraid to get in there and press, smooth, and indent the salad to get the contours just right. You can lightly oil your hands to prevent the salad from sticking.
Frequently Asked Questions (FAQ) About Your Cranial Creation
Here are answers to some questions that may be rattling around in your head.
1. My salad seems a bit loose. How can I make it firmer so it holds the skull shape?
This is almost always due to either the cauliflower being too wet or the salad not being chilled long enough. If you’ve already mixed it, the best solution is to chill it for a longer period. An extra couple of hours in the fridge can work wonders. In the future, ensure your cauliflower is bone-dry before mixing.
2. Can I use a different type of salad base?
Yes, this skull shape concept works well with any creamy, moldable salad. A classic chicken salad, egg salad, or even a thick, creamy pasta salad could be used as the base. You might just need to adjust the garnishes to stand out against a different colored background.
3. I’m not a fan of bacon. What can I use instead?
You can simply omit the bacon for a vegetarian version of the salad. If you still want that smoky, savory flavor, you could try adding a pinch of smoked paprika to the dressing or using a smoked cheddar cheese instead of sharp cheddar.
4. How long will the Skull Salad last in the refrigerator?
Once assembled, the Skull Salad is best eaten within 24 hours for optimal freshness and appearance. Unassembled, the salad mixture will keep in an airtight container in the refrigerator for up to 3 days.
5. How do I transport this to a party without it falling apart?
The key is to assemble it on the platter you plan to serve it on. Chill it thoroughly after assembly until it’s very firm. Cover it loosely with plastic wrap (you can insert toothpicks into the top to keep the wrap from touching the skull) and transport it flat. If you have a long car ride, placing the platter in a cooler with ice packs will help it stay firm.

Skull Salad recipe
Ingredients
-
For the Salad Base:
-
2 large heads of cauliflower (about 4-5 lbs total), cut into bite-sized florets
-
1 cup sharp cheddar cheese, shredded
-
8 slices of bacon, cooked until crispy and crumbled
-
2 celery stalks, finely chopped
-
4 green onions, thinly sliced (both white and green parts)
-
-
For the Creamy Dressing:
-
1 cup real mayonnaise
-
½ cup sour cream or full-fat plain Greek yogurt
-
2 tablespoons Dijon mustard
-
1 tablespoon apple cider vinegar
-
½ teaspoon salt (or to taste)
-
½ teaspoon black pepper
-
¼ teaspoon garlic powder
-
-
For the Skull Features:
-
2-3 whole pitted black olives
-
¼ cup slivered almonds
-
Instructions
Part 1: Preparing the Cauliflower Salad Base
-
Cook the Cauliflower: Steam the cauliflower florets until they are tender-crisp. You should be able to easily pierce them with a fork, but they should not be mushy. You can do this in a steamer basket on the stove (8-10 minutes) or in the microwave. To microwave, place the florets in a large microwave-safe bowl with a few tablespoons of water, cover, and cook on high for 6-8 minutes, stirring halfway through.
-
Dry and Cool: This is a critical step. Drain the cooked cauliflower thoroughly. Spread it out on a baking sheet lined with paper towels and gently pat it dry. Let it cool completely to room temperature, and then chill in the refrigerator for at least 30 minutes. Starting with cool, dry cauliflower is the secret to a firm, non-watery salad.
-
Chop the Cauliflower: Once cooled, finely chop the cauliflower into small, pea-sized pieces. You can do this by hand with a knife or by pulsing it very carefully in a food processor. Do not over-process, or you will end up with mush.
-
Make the Dressing: In a small bowl, whisk together the mayonnaise, sour cream (or Greek yogurt), Dijon mustard, apple cider vinegar, salt, pepper, and garlic powder until smooth.
-
Combine All Ingredients: In a large bowl, combine the chopped cauliflower, shredded cheddar cheese, crumbled bacon, chopped celery, and sliced green onions. Pour the dressing over the top and gently fold everything together until all the ingredients are evenly coated.
-
Chill for Flavor and Form: Cover the bowl and chill the salad in the refrigerator for at least 2 hours, but preferably 4 hours or overnight. This chilling period is essential for two reasons: it allows the flavors to meld together, and it firms up the salad, which will make it much easier to mold into the skull shape.
Part 2: Sculpting and Decorating the Skull
-
Choose Your Platter: Select a large, flat serving platter. A dark-colored platter (black or dark grey) will provide a dramatic contrast to the pale skull.
-
Mound the Salad: Scoop the chilled salad mixture onto the center of the platter. Using your hands and a spatula, begin to mold the mound into a basic skull shape—slightly oval and taller at the top, tapering down towards the “jaw.”
-
Create the Facial Contours: Use your fingers to create indentations for the eye sockets. Press in slightly on the sides to create defined “cheekbones.” Smooth the surface with the back of a spoon or a spatula.
-
Add the Eyes and Nose: For the eye sockets, press two whole black olives firmly into the indentations you created. For the nasal cavity, you can cut a third olive in half lengthwise and press it, cut-side down, into the center of the face to create an inverted triangle shape.
-
Create the Teeth: This is the final, creepy touch. Gently press the slivered almonds into the “mouth” area of the skull to create a row of jagged, uneven teeth. You can make a top and bottom row, leaving a slight gap in between.
-
Final Chill and Serve: Once your skull is complete, you can place it back in the refrigerator, loosely covered, until you are ready to serve. This will help it stay firm.
Nutrition
- Serving Size: one normal portion
- Calories: 280-320