")

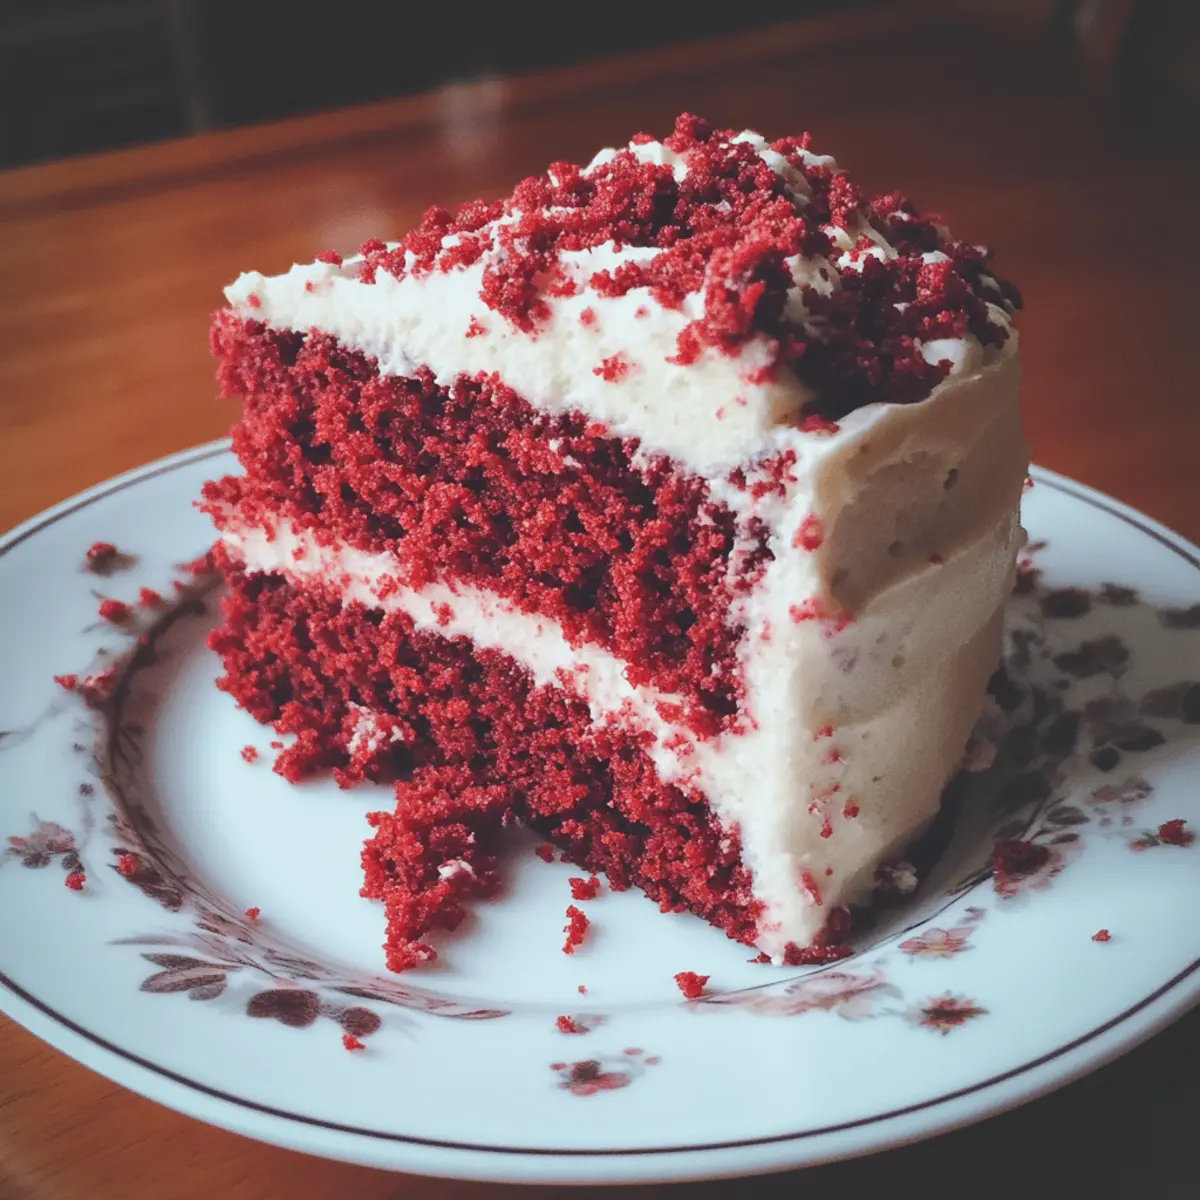
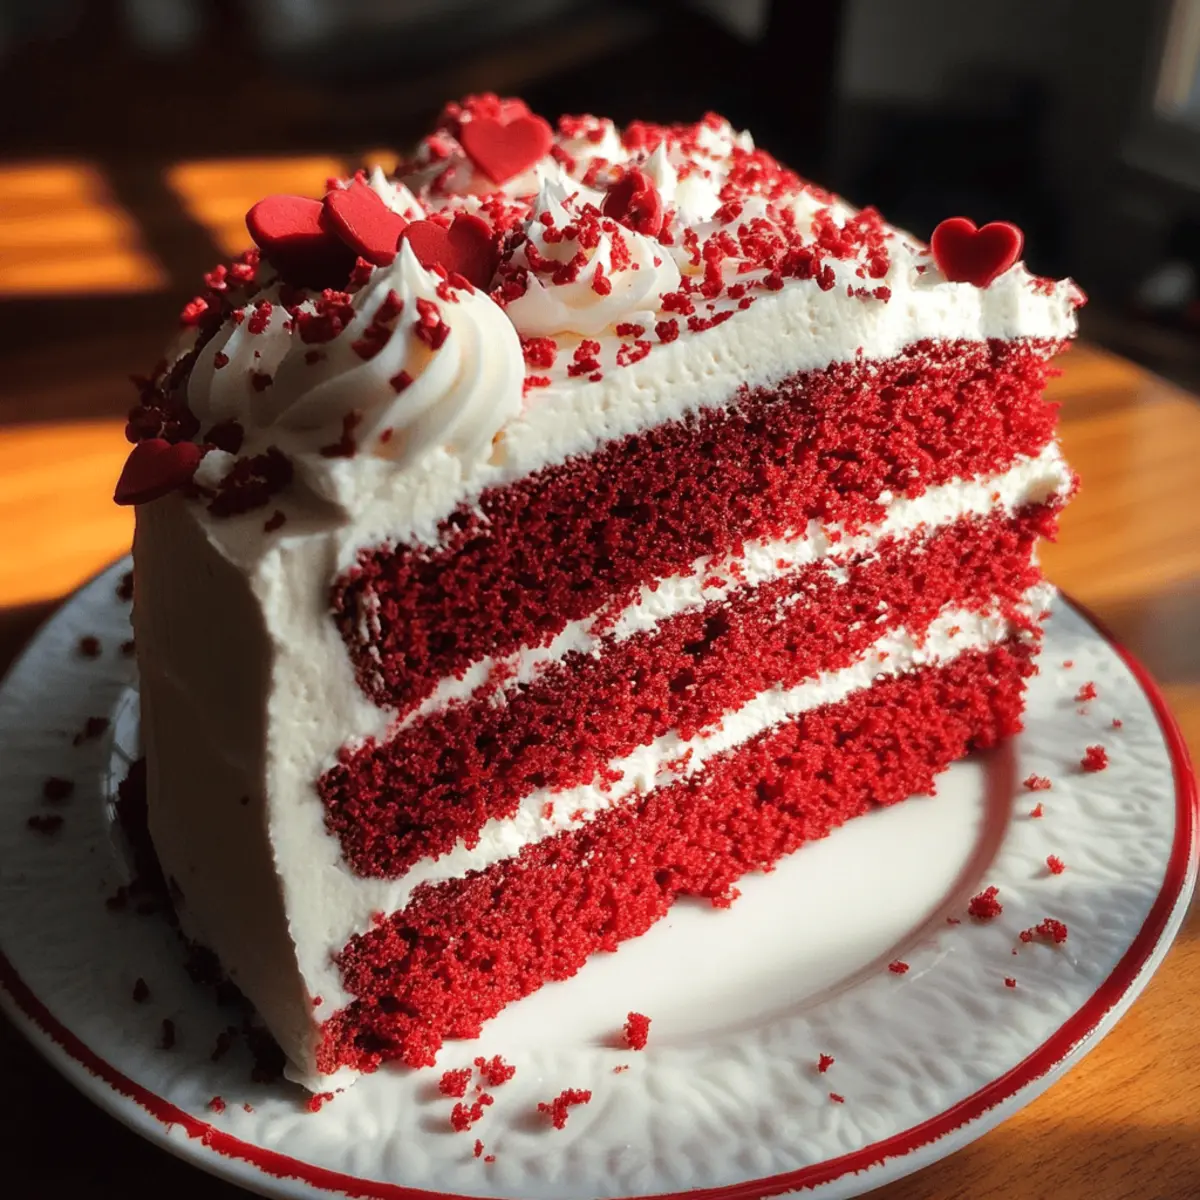
There’s something truly irresistible about a slice of red velvet cake—the way its vibrant crimson crumb melts into that luscious cream cheese frosting feels like a little celebration in every bite. One afternoon, craving a homemade treat that would wow my friends without overwhelming my schedule, I discovered the perfect red velvet cake recipe that’s both easy to make and incredibly flavorful. Whether you’re a seasoned baker or someone who just loves the comfort of homemade desserts, this recipe transforms simple ingredients into a crowd-pleasing classic that’s as delightful to bake as it is to eat. Let me take you through how to bring this timeless cake to life in your own kitchen—you might just find your new favorite baking ritual.
Why is Red Velvet Cake so beloved?
Irresistible Flavor: This recipe balances rich cocoa with tangy buttermilk for that classic red velvet taste. Moist and Tender: Each bite melts softly thanks to a perfect blend of ingredients. Simple to Bake: No complicated techniques—ideal for bakers of all levels. Cream Cheese Frosting: The luscious frosting adds creamy sweetness that complements perfectly. Show-Stopping Appeal: Vibrant red color makes it a stunning centerpiece for any occasion.
Red Velvet Cake Ingredients
For the Cake Batter
- All-purpose flour – the foundation for that tender crumb; sift well for lightness.
- Cocoa powder – just enough to add subtle chocolate depth without overpowering the red velvet flavor.
- Sugar – balances the cocoa’s slight bitterness and keeps the cake moist.
- Buttermilk – adds tang and reacts with baking soda for a tender, airy texture.
- Baking soda – helps the cake rise beautifully; ensure it’s fresh for best results.
- Salt – enhances all the individual flavors and keeps sweetness in check.
- Vegetable oil – keeps the cake moist and rich without heaviness; a key ingredient in this Red Velvet Cake.
- Eggs – provide structure and richness; use large eggs at room temperature.
- Vanilla extract – adds warmth and rounds out the flavors.
- Red food coloring – achieves that vibrant red hue that makes red velvet so iconic; gel works best for intense color without thinning the batter.
For the Cream Cheese Frosting
- Cream cheese – softened for the creamiest, tangy frosting that melts in your mouth.
- Unsalted butter – adds richness and helps the frosting hold its shape.
- Powdered sugar – sweetens and smooths the frosting to a perfect consistency.
- Vanilla extract – enhances the frosting’s flavor with a subtle vanilla note.
How to Make Red Velvet Cake
-
Preheat & Prep: Preheat your oven to 350°F (175°C) and grease two 9-inch round pans. Line with parchment for easy cake removal and even browning.
-
Mix Dry Ingredients: In a large bowl, whisk flour, cocoa, baking soda, and salt until combined. These dry ingredients form the tender crumb you love in red velvet.
-
Combine Wet Ingredients: In another bowl, whisk oil, sugar, eggs, vanilla, buttermilk, and red food coloring until smooth and vibrant crimson. Ensure color is even throughout the batter.
-
Blend the Batter: Gradually fold dry ingredients into wet mixture until smooth, avoiding overmixing. Batter should be thick, velvety, and a vivid red with no white streaks.
-
Bake the Layers: Divide batter evenly between pans and smooth tops. Bake at 350°F for 25–30 minutes or until a toothpick comes out clean.
-
Cool Completely: Let cakes rest in pans for 10 minutes, then transfer to wire racks. Cool fully before frosting to prevent melting your cream cheese frosting.
-
Prepare the Frosting: Beat softened cream cheese and butter until creamy and well-blended. Gradually add powdered sugar and vanilla, beating until frosting is fluffy and smooth.
-
Frost & Assemble: Place first cake layer on a platter, spread frosting evenly, top with second layer, and cover sides. Smooth frosting or create decorative swirls as desired.
Optional: Chill cake for 15 minutes for cleaner frosting edges.
Exact quantities are listed in the recipe card below.

Red Velvet Cake Variations
Feel free to get creative with your red velvet cake and add your personal touch for a delightful twist!
-
Gluten-Free: Substitute all-purpose flour with a gluten-free blend for a deliciously accommodating option. Just ensure the blend you choose is suitable for cakes.
-
Cocoa Boost: Add an extra tablespoon of cocoa powder to enrich the chocolate flavor, enhancing that moist cake with a deeper cocoa profile that chocolate lovers will adore.
-
Nutty Flavor: Fold in 1/2 cup of finely chopped walnuts or pecans for a satisfying crunch and rustic warmth. The nuts add a beautiful texture to the soft cake layers.
-
Spiced Up: Incorporate a teaspoon of cinnamon or nutmeg into your dry mixture for a warm, aromatic twist. This adds an unexpected flavor layer that elevates each bite.
-
Vegan Delight: Replace eggs with unsweetened applesauce and use plant-based butter and milk to transform this cake into a vegan masterpiece that’s still treat-worthy.
-
Zesty Finish: Add a teaspoon of orange or lemon zest to the batter for a refreshing citrus note. This brightens the flavor and adds a lovely complexity that balances the richness.
-
Layered Surprise: Create a layered confection by adding a thin layer of raspberry or strawberry jam between the cake layers. This brings a fruity contrast that complements the creaminess of the frosting.
-
Chocolate Cream Cheese Frosting: Swap some powdered sugar for cocoa powder in your cream cheese frosting for a chocolatey twist that pairs splendidly with the red velvet cake’s flavor.
Expert Tips for Red Velvet Cake
- Use Fresh Ingredients: Always check that your baking soda and cocoa powder are fresh to ensure the cake rises properly and has vibrant flavor.
- Room Temperature Eggs: Bring eggs to room temperature before mixing to help create an even, smooth batter without lumps.
- Mix Gently: Fold dry ingredients in carefully to avoid a dense texture; overmixing can make your Red Velvet Cake tough.
- Gel Food Coloring: Choose gel-based red food coloring for a brilliant hue without thinning your batter or altering taste.
- Cool Completely: Frost only when the cake layers are fully cooled to prevent melting your cream cheese frosting and losing its perfect texture.
- Chill for Neat Frosting: Refrigerate the assembled cake briefly before serving to set the frosting and give your Red Velvet Cake a polished finish.
Make Ahead Options
These Red Velvet Cake options are perfect for busy home cooks looking to save time without sacrificing flavor! You can prepare the cake layers up to 24 hours in advance by baking them, cooling completely, and then wrapping each layer tightly in plastic wrap to maintain moisture. The cream cheese frosting can also be made ahead and stored in the refrigerator for up to 3 days; just be sure to bring it back to room temperature and re-whip before frosting to restore its creamy consistency. When you’re ready to impress, simply frost your cake and enjoy your delicious creation with minimal effort!
What to Serve with Red Velvet Cake?
There’s nothing quite like enjoying a slice of this delightful dessert while creating a memorable meal experience.
-
Vanilla Ice Cream: A classic pairing that brings a creamy, cold contrast to the rich, moist cake. The sweetness of the ice cream enhances the flavors beautifully.
-
Fresh Berries: Strawberries or raspberries add a burst of tanginess that balances the cake’s sweetness. Their vibrant colors also elevate the cake presentation.
-
Chocolate-dipped Strawberries: Indulge your guests with chocolate-dipped strawberries that mirror the cake’s richness. This duo makes for a romantic dessert display.
-
Coffee: A warm cup of coffee enhances the flavors of the red velvet cake. The smooth bitterness of coffee complements the cake’s sweet and tangy notes perfectly.
-
Sparkling Water with Lemon: For a refreshing non-alcoholic option, serve sparkling water with a slice of lemon. It cleanses the palate after each rich bite.
-
Cream Cheese Mousse: For a decadent touch, whip up a cream cheese mousse. It mirrors the frosting flavors and adds a light, airy texture alongside the cake.
-
Caramel Sauce: Drizzling warm caramel sauce over the cake can add an irresistible sweetness. The gooey texture pairs exquisitely with the airy cake layers.
-
Chocolate Milkshake: Indulge in nostalgia with a chocolate milkshake as a fun twist. The creamy goodness makes the dessert experience even more delightful.
How to Store and Freeze Red Velvet Cake
Fridge: Keep leftover red velvet cake in an airtight container in the fridge for up to 5 days. This helps maintain its moistness and flavor.
Freezer: To freeze, wrap individual slices tightly in plastic wrap, then place them in a zip-top bag. They can be stored for up to 3 months without losing taste.
Reheating: Thaw a slice in the fridge overnight or at room temperature for a couple of hours. Reheat in the microwave for 10-15 seconds if you prefer it warm.
Frosting Storage: If you have extra cream cheese frosting, store it separately in the refrigerator for up to 1 week in a sealed container.

The Best Moist Red Velvet Cake Recipe You’ll Crave Every Time Recipe FAQs
How do I know if my buttermilk is good to use for this Red Velvet Cake?
Fresh buttermilk should smell tangy but pleasant, never sour or off-putting. If it’s lumpy or has dark spots all over, it’s best to toss it out and use a fresh carton for the best texture and flavor in your cake.
What’s the best way to store leftover Red Velvet Cake?
Store leftovers in an airtight container in the fridge for up to 5 days to keep the cake moist and the frosting fresh. If you want to enjoy it later, tightly cover the cake or individual slices with plastic wrap before refrigerating.
Can I freeze Red Velvet Cake, and how should I do it?
Absolutely! Wrap each slice tightly in plastic wrap, then place them inside a zip-top freezer bag or airtight container to avoid freezer burn. Store in the freezer for up to 3 months. When ready to eat, thaw in the fridge overnight or at room temperature for a couple of hours for the best texture.
What if my Red Velvet Cake turns out dry or dense?
Dryness often happens if the cake is overbaked or the oven temperature is too high. I recommend checking your oven with an oven thermometer and baking the cake just until a toothpick inserted in the center comes out clean or with a few moist crumbs. Also, gently fold the dry ingredients rather than mixing vigorously to keep the crumb tender and light.
Is Red Velvet Cake safe for pets or people with dietary restrictions?
This classic Red Velvet Cake contains ingredients like eggs, dairy, and food coloring, which aren’t suitable for pets. For those with allergies, consider substituting or avoiding ingredients like eggs or using dairy-free cream cheese alternatives, but note this might affect texture and flavor. Always tailor recipes to your specific dietary needs with care!
The Best Moist Red Velvet Cake Recipe You’ll Crave Every Time
Ingredients
Equipment
Method
- Preheat your oven to 350°F (175°C) and grease two 9-inch round pans. Line with parchment for easy cake removal.
- In a large bowl, whisk flour, cocoa, baking soda, and salt until combined.
- In another bowl, whisk oil, sugar, eggs, vanilla, buttermilk, and red food coloring until smooth.
- Gradually fold dry ingredients into wet mixture until smooth.
- Divide batter evenly between pans and bake for 25–30 minutes or until a toothpick comes out clean.
- Let cakes rest in pans for 10 minutes, then transfer to wire racks to cool completely.
- Beat softened cream cheese and butter until creamy. Gradually add powdered sugar and vanilla, beating until fluffy.
- Place first cake layer on a platter, spread frosting evenly, top with second layer, and cover sides.