")

There are few words in the English language that bring as much universal, unadulterated joy as “pizza night.” In our house, it was a sacred Friday ritual. The debate over toppings, the anticipation as the oven preheated, the glorious moment the cheesy, bubbly masterpiece emerged—it was perfection. But as my focus shifted towards healthier eating habits, a quiet conflict began to brew. My heart (and stomach) craved the satisfaction of pizza, but my body craved something lighter, less carb-heavy. I tried the cauliflower crusts, the gluten-free doughs, and the whole wheat bases, and while some were good, none truly silenced the craving without a significant amount of work. One afternoon, staring at a surplus of zucchini from the farmers market, an idea sparked. What if the base wasn’t a crust at all? What if it was the vegetable itself? I was skeptical, haunted by visions of a watery, soggy mess. But I was determined. I sliced the zucchini into thick rounds, diligently salted and dried them to draw out the moisture, and topped them with our favorite classic pizza fixings. I slid them into the oven, holding my breath. What came out was not just a substitute; it was a revelation. Each bite was a burst of pizza flavor—the savory sauce, the salty pepperoni, the gooey, browned cheese—all held together by a tender, perfectly cooked zucchini base that was anything but soggy. My kids, notorious vegetable skeptics, descended on them like a pack of wolves, declaring them “pizza bites” and demanding a second batch. We had found our new pizza night. It was all the joy, all the flavor, and all the satisfaction, brilliantly disguised in a healthy, vibrant, and ridiculously easy-to-make package.
Why Zucchini Mini Pizzas Will Revolutionize Your Snack Game
This recipe is far more than just a clever way to use up summer squash. It’s a fundamental shift in how we can approach one of our favorite foods, offering a host of benefits that make it a staple for families, health-conscious individuals, and avid snackers alike.
- The Ultimate Healthy Indulgence: This is the recipe’s superpower. It completely satisfies the craving for pizza with a tiny fraction of the calories, carbohydrates, and gluten found in traditional dough. Zucchini is a nutritional powerhouse, packed with water, fiber, Vitamin C, and antioxidants. By swapping a flour-based crust for a vegetable base, you’re transforming a heavy meal into a light, guilt-free, and nutrient-dense treat. It’s the perfect solution for those following low-carb, keto, gluten-free, or simply a healthier lifestyle.
- Incredibly Fast and Effortless: Forget proofing dough, kneading, or rolling. The most time-consuming part of this recipe is waiting a few minutes for the zucchini to “sweat.” From slicing the vegetable to pulling the bubbly, cheesy bites out of the oven or air fryer, you can have a satisfying meal or snack ready in under 30 minutes. It’s the ideal recipe for busy weeknights, last-minute appetizer needs, or a quick and satisfying lunch.
- The King of Customization: A zucchini round is a blank canvas, ready to be painted with your favorite flavors. This recipe is endlessly adaptable to any dietary preference or craving. Keep it classic with pepperoni, go vegetarian with a rainbow of bell peppers and olives, or make it gourmet with prosciutto and fig jam. It’s an amazing way to use up leftover vegetables or small amounts of protein in your fridge. Everyone in the family can create their own custom mini pizza, making it a fun and interactive meal for picky eaters.
- The Perfect Vehicle for “Sneaky” Vegetables: For parents engaged in the daily battle of getting their children to eat vegetables, these zucchini mini pizzas are a secret weapon. The familiar and beloved flavors of pizza—sauce, cheese, and favorite toppings—make the zucchini base not just palatable, but genuinely desirable. Kids are often so excited about making and eating “pizza bites” that they don’t even focus on the fact that the foundation is a green vegetable.
Ingredients for Perfect Zucchini Mini Pizzas
Simplicity is key, but the quality and type of each ingredient can make a big difference in the final texture and flavor.
- 2 large, wide Zucchini: The size is important here. Look for zucchini that are at least 2-3 inches in diameter to give you a nice, sturdy base for your pizzas.
- 1 teaspoon Kosher Salt: For drawing out moisture from the zucchini.
- ½ cup Pizza Sauce or Marinara Sauce: Use a good quality, thick sauce. A watery sauce will contribute to a soggier result.
- 1 ½ cups shredded Low-Moisture Mozzarella Cheese: This is critical! Do not use fresh mozzarella in water, as its high moisture content will make the pizzas wet. The pre-shredded, low-moisture kind is perfect.
- ½ cup Mini Pepperoni or Turkey Pepperoni: The mini size is ideal for these small bites, ensuring you get pepperoni flavor in every bite.
- 1 tablespoon Olive Oil
- Optional Toppings:
- Finely diced bell peppers
- Sliced black olives
- Cooked, crumbled sausage
- Fresh basil leaves for garnish
- Red pepper flakes for heat
- A sprinkle of Italian seasoning or dried oregano
Step-by-Step Instructions to Master Zucchini Mini Pizzas
Follow these steps precisely, especially the preparation of the zucchini, to guarantee a crisp, tender base and avoid a watery outcome. We’ll cover both the oven and air fryer methods.
Step 1: The Crucial Zucchini Prep (The Anti-Soggy Technique)
This is the most important step in the entire recipe. Do not skip it!
- Slice the Zucchini: Wash and dry your zucchini. Trim off the ends. Slice the zucchini into thick rounds, about ½-inch thick each. If you slice them too thin, they will become flimsy and fall apart.
- Salt and Sweat: Arrange the zucchini slices in a single layer on a paper towel-lined baking sheet or a wire rack. Sprinkle both sides of the slices evenly with the kosher salt.
- Let Them Rest: Let the zucchini sit for 15-20 minutes. During this time, you will see beads of water forming on the surface of the slices. This is the salt working its magic, pulling the excess moisture out of the vegetable through osmosis.
- Pat Them Dry: Using more paper towels, thoroughly pat each zucchini slice completely dry on both sides. You want to remove as much of that beaded water as possible.
Step 2: Assembling Your Mini Pizzas
Now for the fun part! Get your toppings ready and form an assembly line.
- Prepare for Cooking:
- For the Oven: Preheat your oven to 425°F (220°C). Line a large baking sheet with parchment paper for easy cleanup.
- For the Air Fryer: Preheat your air fryer to 400°F (200°C) for 5 minutes.
- Arrange the Bases: Place the dried zucchini slices in a single layer on your prepared baking sheet or in your air fryer basket (you will need to work in batches for the air fryer). Brush the tops lightly with olive oil.
- Pre-Bake the Base (Optional but Recommended): For an even firmer base, you can pre-bake the plain zucchini slices for 5-7 minutes in the oven (or 3-4 minutes in the air fryer) before adding toppings. This helps to dry them out even further.
- Add the Sauce: Spoon a small amount of pizza sauce (about 1-2 teaspoons) onto the center of each zucchini slice, spreading it out but leaving a small border around the edge.
- Add the Cheese: Sprinkle a generous amount of shredded mozzarella cheese on top of the sauce.
- Add the Toppings: Top with mini pepperoni and any other toppings you desire. A final sprinkle of Italian seasoning or dried oregano on top of the cheese adds a nice touch.
Step 3: Cooking to Bubbly Perfection
Oven Method:
- Place the baking sheet in the preheated 425°F (220°C) oven.
- Bake for 10-12 minutes, or until the zucchini is tender and the cheese is completely melted, bubbly, and starting to get golden-brown spots.
- For extra browning on the cheese, you can switch the oven to the broil setting for the last 1-2 minutes, but watch them very carefully to prevent burning.
Air Fryer Method:
- Carefully place the assembled zucchini pizzas in the preheated 400°F (200°C) air fryer basket in a single layer. Do not overcrowd.
- Air fry for 5-8 minutes. The exact time will depend on your air fryer model. They are done when the cheese is fully melted and golden, and the zucchini is tender.
Step 4: Cool and Garnish
- Remove the zucchini mini pizzas from the oven or air fryer and let them cool on the pan for a few minutes. This allows them to set up slightly, making them easier to handle.
- Garnish with fresh basil leaves or a sprinkle of red pepper flakes before serving.
Nutrition Facts and Preparation Time
Preparation Time:
- Active Prep Time: 15 minutes
- Inactive “Sweating” Time: 15-20 minutes
- Cook Time: 5-12 minutes
- Total Time: Approximately 40 minutes
Nutrition Facts:
- Servings: Makes approximately 16-20 mini pizzas
- Calories per serving (4 mini pizzas): 150-200 kcal (This is an estimate and will vary significantly based on your specific toppings and amount of cheese used.)
How to Serve Your Zucchini Pizza Bites
These versatile bites can play many roles, from a simple snack to the star of a party platter.
- As a Crowd-Pleasing Appetizer:
- Arrange them on a large platter and serve at your next party or game day gathering.
- Provide a side of warm marinara sauce or classic ranch dressing for dipping.
- As a Light and Healthy Lunch or Dinner:
- Serve a generous portion (6-8 bites) alongside a simple, crisp green salad with a lemon vinaigrette. This creates a balanced, low-carb, and incredibly satisfying meal.
- As a Fun Kid-Friendly Meal or After-School Snack:
- Let the kids help assemble their own pizzas with their favorite toppings.
- Serve with a side of fresh fruit or apple slices for a complete and healthy meal they’ll be excited to eat.
- For Meal Prep:
- Cook a large batch and store them in an airtight container in the refrigerator. They are great eaten cold or can be quickly reheated.
5 Pro Tips for Perfect Zucchini Mini Pizzas Every Time
- Don’t Skip the “Sweat” Step: This is the most critical tip and bears repeating. Zucchini is over 90% water. Salting the slices and patting them dry is the non-negotiable step that draws out this excess moisture and prevents a soggy, watery pizza base.
- Go Wide, Not Long: When shopping, choose zucchini that are thicker and wider in diameter rather than long and skinny. A wider base is more stable, holds more toppings, and provides a better zucchini-to-topping ratio in each bite.
- Low-Moisture Mozzarella is a Must: Avoid fresh mozzarella balls that come packed in water. They release a tremendous amount of liquid when heated and will ruin your pizzas. The firm, pre-shredded low-moisture mozzarella found in bags is your best friend for this recipe.
- Don’t Drown Them in Sauce: Be modest with the sauce. A thin layer is all you need. Too much sauce will add excess moisture and make the toppings slide off. A thick, high-quality pizza sauce will give you the most flavor bang for your buck.
- Use the Broiler for a Pizzeria Finish: If you’re using the oven method, finishing the pizzas under the broiler for the last minute of cooking is a professional trick. It gives the cheese those beautiful bubbly, browned spots that are characteristic of a real pizza and adds a wonderful texture. Just don’t walk away from the oven!
Frequently Asked Questions (FAQ)
1. My zucchini pizzas were still a little soggy. What did I do wrong?
This is the most common issue and almost always comes back to moisture. There are a few likely culprits: 1) You may not have let them “sweat” long enough with the salt, or didn’t pat them dry enough. 2) Your pizza sauce might be too thin and watery. 3) You might have used a high-moisture cheese like fresh mozzarella. To guarantee a firm base, try the optional step of pre-baking the zucchini slices for a few minutes before adding any toppings.
2. Can I make these ahead of time?
Yes! They are a great make-ahead snack. You can cook them completely, let them cool, and store them in an airtight container in the fridge for up to 3 days. To reheat, place them in a 375°F (190°C) air fryer or oven for 3-5 minutes until the cheese is re-melted and the base is warmed through. This will crisp them up much better than a microwave.
3. Can I use yellow summer squash instead of zucchini?
Absolutely. Yellow squash works just as well and has a very similar texture and moisture content. The preparation and cooking process is identical. Using a mix of both green and yellow squash can make for a beautiful presentation.
4. Are these Zucchini Mini Pizzas keto-friendly?
Yes, they are exceptionally keto-friendly! Zucchini is a very low-carb vegetable. As long as you use a no-sugar-added pizza sauce and stick to keto-friendly toppings like pepperoni, sausage, and low-carb veggies, these make a perfect keto meal or snack.
5. Can I freeze them?
While you technically can, the texture of the zucchini may change upon thawing. Zucchini can become much softer and more watery after being frozen and reheated. For the best quality and texture, it’s recommended to make them fresh or store them in the refrigerator for a few days.

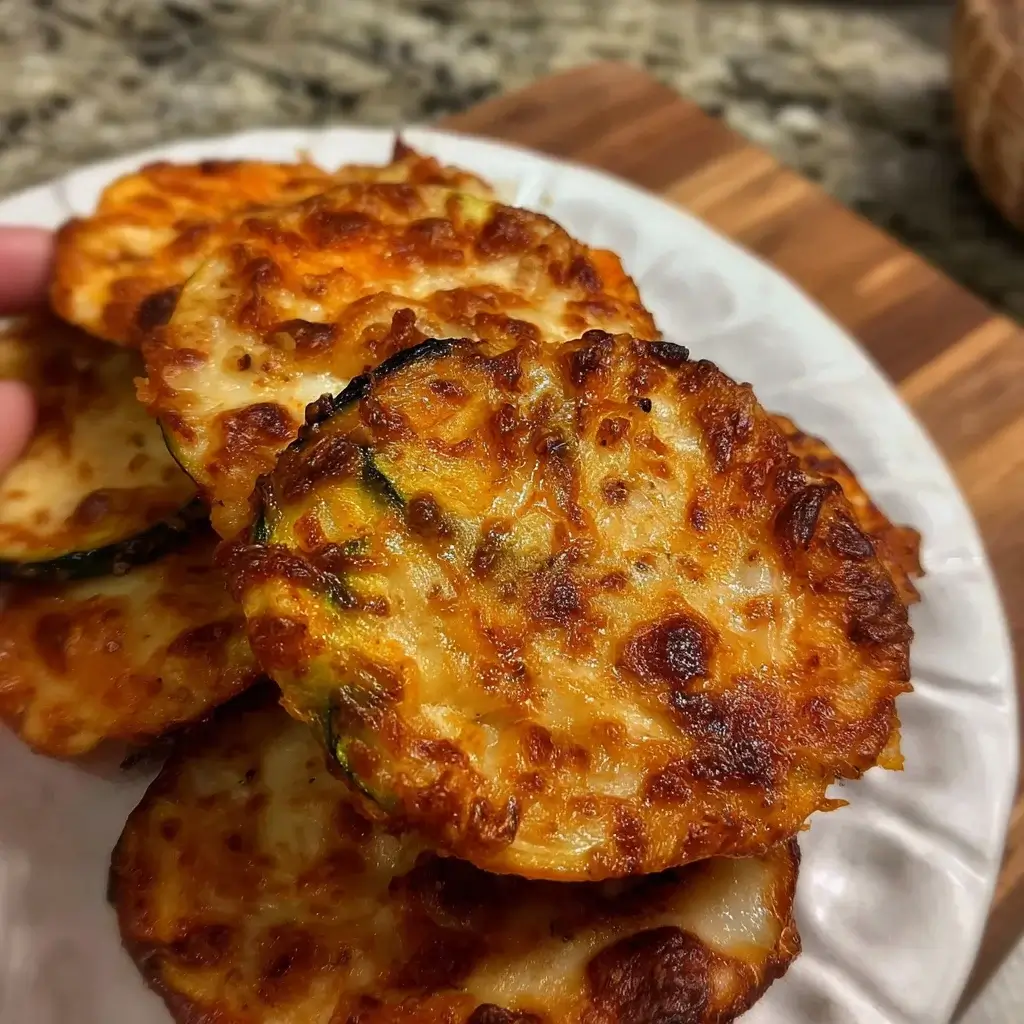
Zucchini Mini Pizza recipe
Ingredients
-
2 large, wide Zucchini: The size is important here. Look for zucchini that are at least 2-3 inches in diameter to give you a nice, sturdy base for your pizzas.
-
1 teaspoon Kosher Salt: For drawing out moisture from the zucchini.
-
½ cup Pizza Sauce or Marinara Sauce: Use a good quality, thick sauce. A watery sauce will contribute to a soggier result.
-
1 ½ cups shredded Low-Moisture Mozzarella Cheese: This is critical! Do not use fresh mozzarella in water, as its high moisture content will make the pizzas wet. The pre-shredded, low-moisture kind is perfect.
-
½ cup Mini Pepperoni or Turkey Pepperoni: The mini size is ideal for these small bites, ensuring you get pepperoni flavor in every bite.
-
1 tablespoon Olive Oil
-
Optional Toppings:
-
Finely diced bell peppers
-
Sliced black olives
-
Cooked, crumbled sausage
-
Fresh basil leaves for garnish
-
Red pepper flakes for heat
-
A sprinkle of Italian seasoning or dried oregano
-
Instructions
Step 1: The Crucial Zucchini Prep (The Anti-Soggy Technique)
This is the most important step in the entire recipe. Do not skip it!
-
Slice the Zucchini: Wash and dry your zucchini. Trim off the ends. Slice the zucchini into thick rounds, about ½-inch thick each. If you slice them too thin, they will become flimsy and fall apart.
-
Salt and Sweat: Arrange the zucchini slices in a single layer on a paper towel-lined baking sheet or a wire rack. Sprinkle both sides of the slices evenly with the kosher salt.
-
Let Them Rest: Let the zucchini sit for 15-20 minutes. During this time, you will see beads of water forming on the surface of the slices. This is the salt working its magic, pulling the excess moisture out of the vegetable through osmosis.
-
Pat Them Dry: Using more paper towels, thoroughly pat each zucchini slice completely dry on both sides. You want to remove as much of that beaded water as possible.
Step 2: Assembling Your Mini Pizzas
Now for the fun part! Get your toppings ready and form an assembly line.
-
Prepare for Cooking:
-
For the Oven: Preheat your oven to 425°F (220°C). Line a large baking sheet with parchment paper for easy cleanup.
-
For the Air Fryer: Preheat your air fryer to 400°F (200°C) for 5 minutes.
-
-
Arrange the Bases: Place the dried zucchini slices in a single layer on your prepared baking sheet or in your air fryer basket (you will need to work in batches for the air fryer). Brush the tops lightly with olive oil.
-
Pre-Bake the Base (Optional but Recommended): For an even firmer base, you can pre-bake the plain zucchini slices for 5-7 minutes in the oven (or 3-4 minutes in the air fryer) before adding toppings. This helps to dry them out even further.
-
Add the Sauce: Spoon a small amount of pizza sauce (about 1-2 teaspoons) onto the center of each zucchini slice, spreading it out but leaving a small border around the edge.
-
Add the Cheese: Sprinkle a generous amount of shredded mozzarella cheese on top of the sauce.
-
Add the Toppings: Top with mini pepperoni and any other toppings you desire. A final sprinkle of Italian seasoning or dried oregano on top of the cheese adds a nice touch.
Step 3: Cooking to Bubbly Perfection
Oven Method:
-
Place the baking sheet in the preheated 425°F (220°C) oven.
-
Bake for 10-12 minutes, or until the zucchini is tender and the cheese is completely melted, bubbly, and starting to get golden-brown spots.
-
For extra browning on the cheese, you can switch the oven to the broil setting for the last 1-2 minutes, but watch them very carefully to prevent burning.
Air Fryer Method:
-
Carefully place the assembled zucchini pizzas in the preheated 400°F (200°C) air fryer basket in a single layer. Do not overcrowd.
-
Air fry for 5-8 minutes. The exact time will depend on your air fryer model. They are done when the cheese is fully melted and golden, and the zucchini is tender.
Step 4: Cool and Garnish
-
Remove the zucchini mini pizzas from the oven or air fryer and let them cool on the pan for a few minutes. This allows them to set up slightly, making them easier to handle.
-
Garnish with fresh basil leaves or a sprinkle of red pepper flakes before serving.
Nutrition
- Serving Size: one normal portion
- Calories: 150-200